

Bakery-Style Peanut Butter Cookies At Home
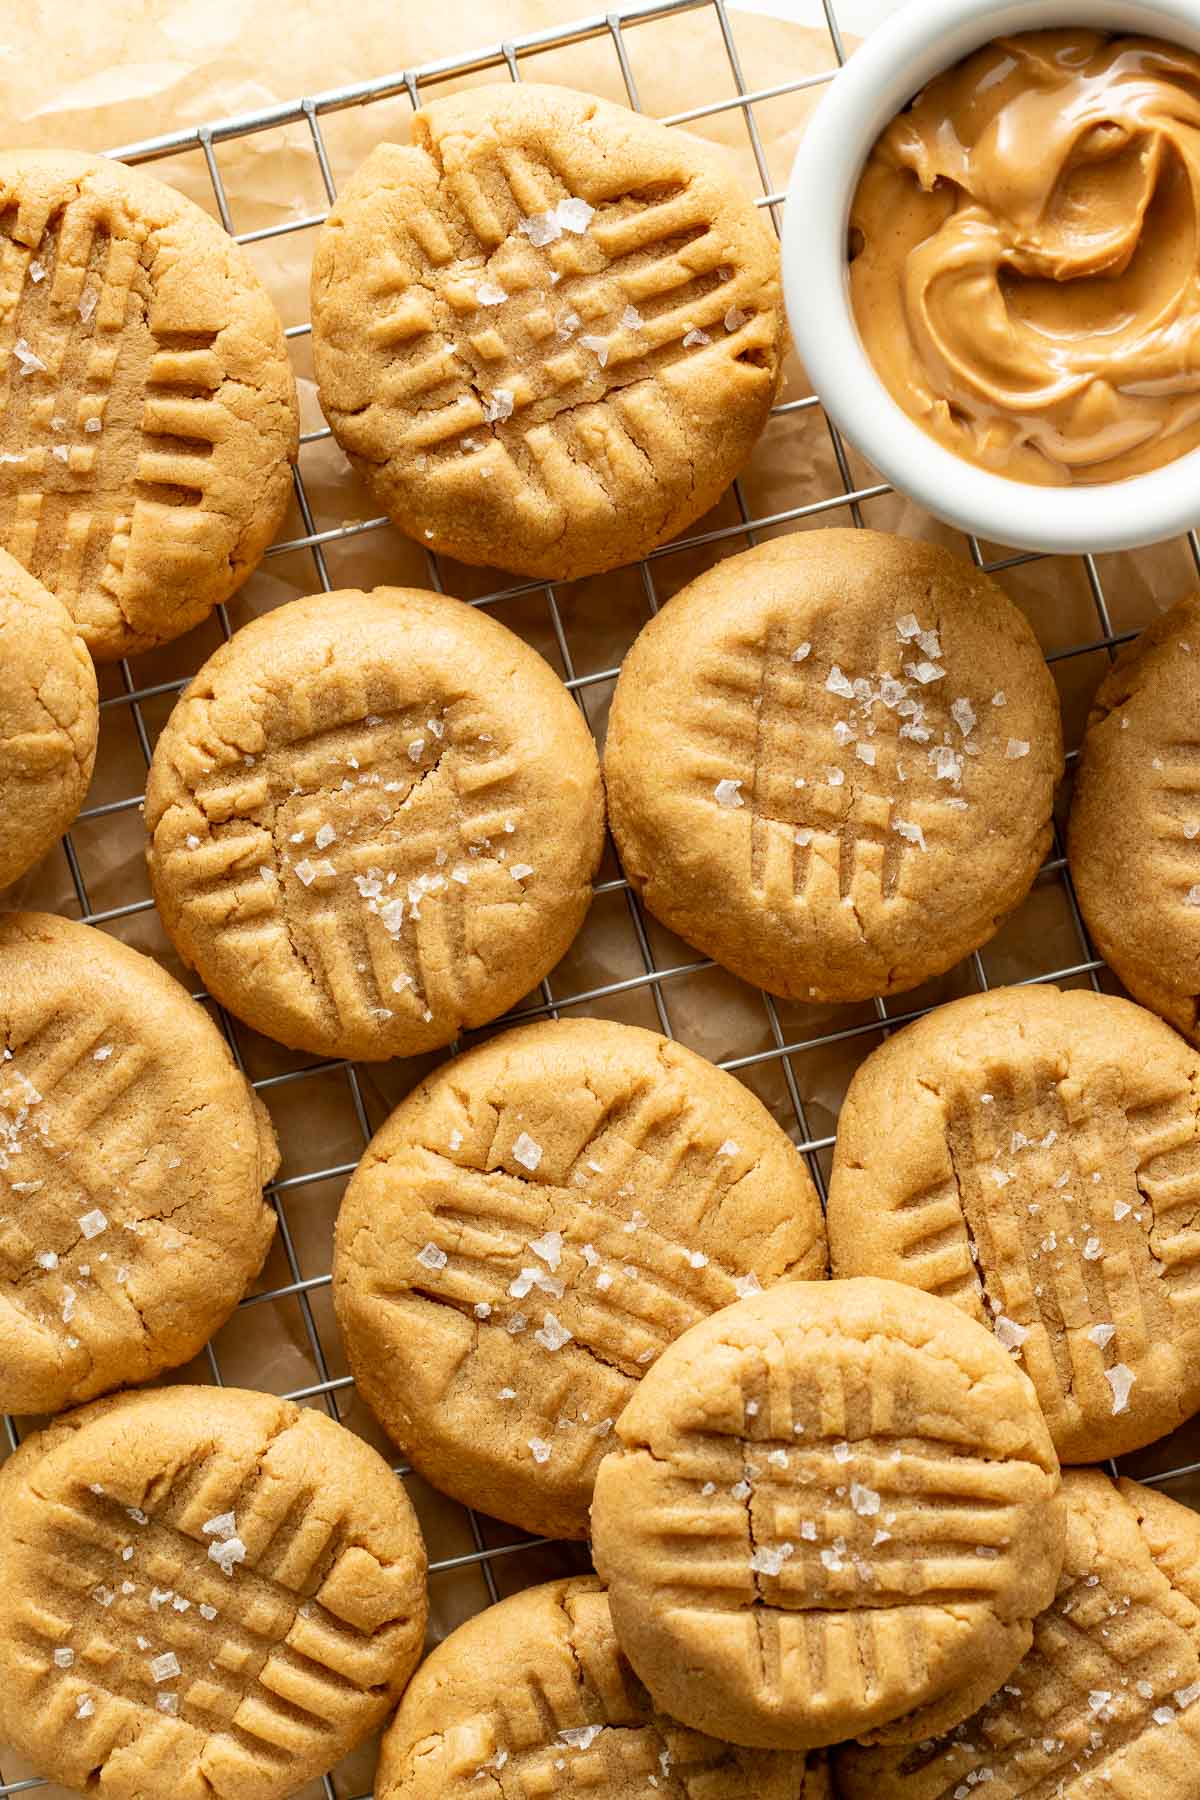
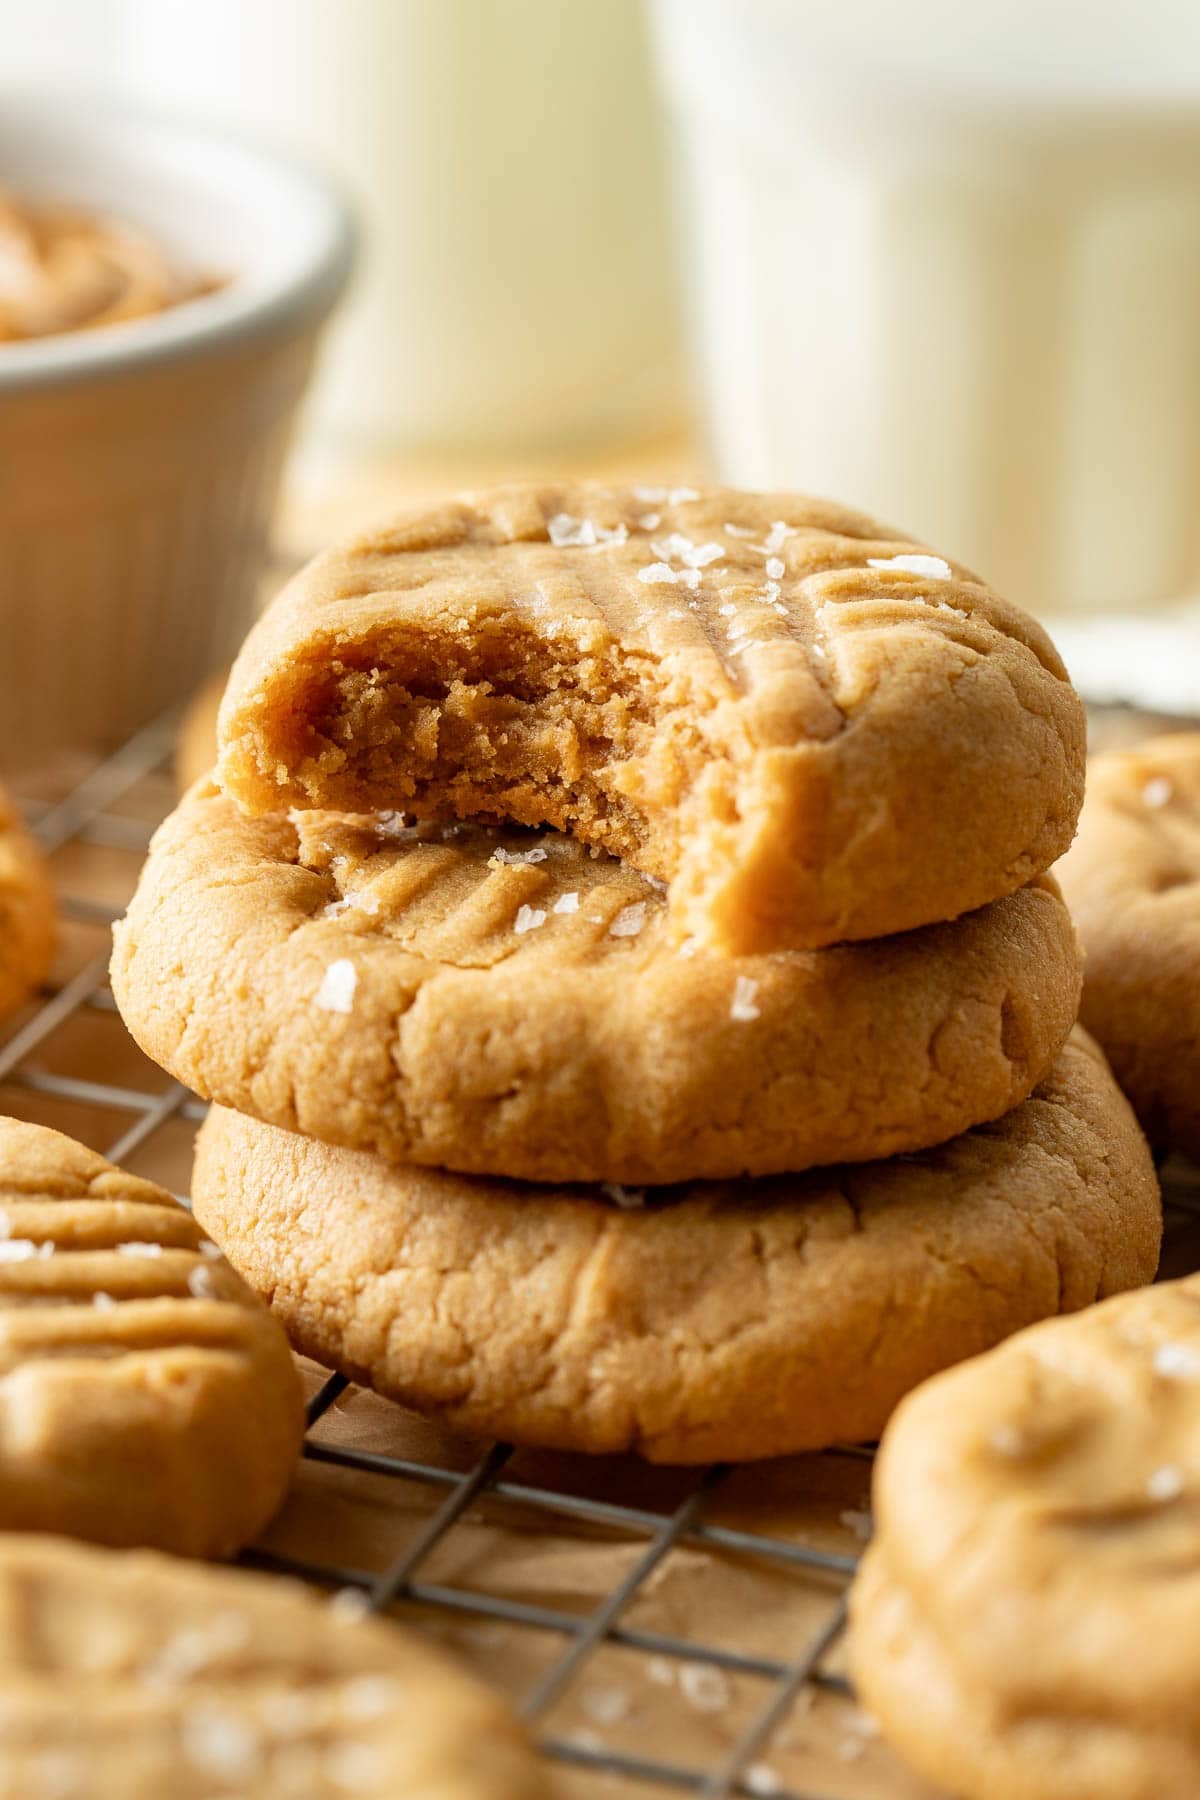
Is there anything more nostalgic than homemade peanut butter cookies with those iconic crosshatch fork marks? Think crisp, golden edges with soft, chewy centers that stay tender for days. Their amazing texture? It’s thanks to using a combination of brown and white sugar, as well as an extra egg yolk. Total perfection! 🙌🏻
This is the peanut butter cookie recipe you turn to when you want reliably foolproof results.
I’m solidly on team creamy peanut butter when it comes to cookies, but feel free to swap with chunky peanut butter for added crunch and texture. You could also throw in some peanut butter baking chips which, when added to cookies, create a melt-in-your-mouth, gooey peanut butter texture. Check out these copycat Levain chocolate peanut butter cookies if you need photographic evidence. 😜
So Easy My Kids Can Make ‘Em On Their Own!
My peanut butter cookie recipe follows a classic creaming method, with a few key techniques that guarantee success.
Quick tips: Be sure to scrape down the sides of the bowl as needed. Also, do not skip the recommended chill time for the dough! Not only does it prevent spreading (otherwise the cookies will end up thinner and crispier), but it helps to deepen the flavor.
I must have tested these cookies a dozen times, and I promise you’ll get better results when you chill the dough.
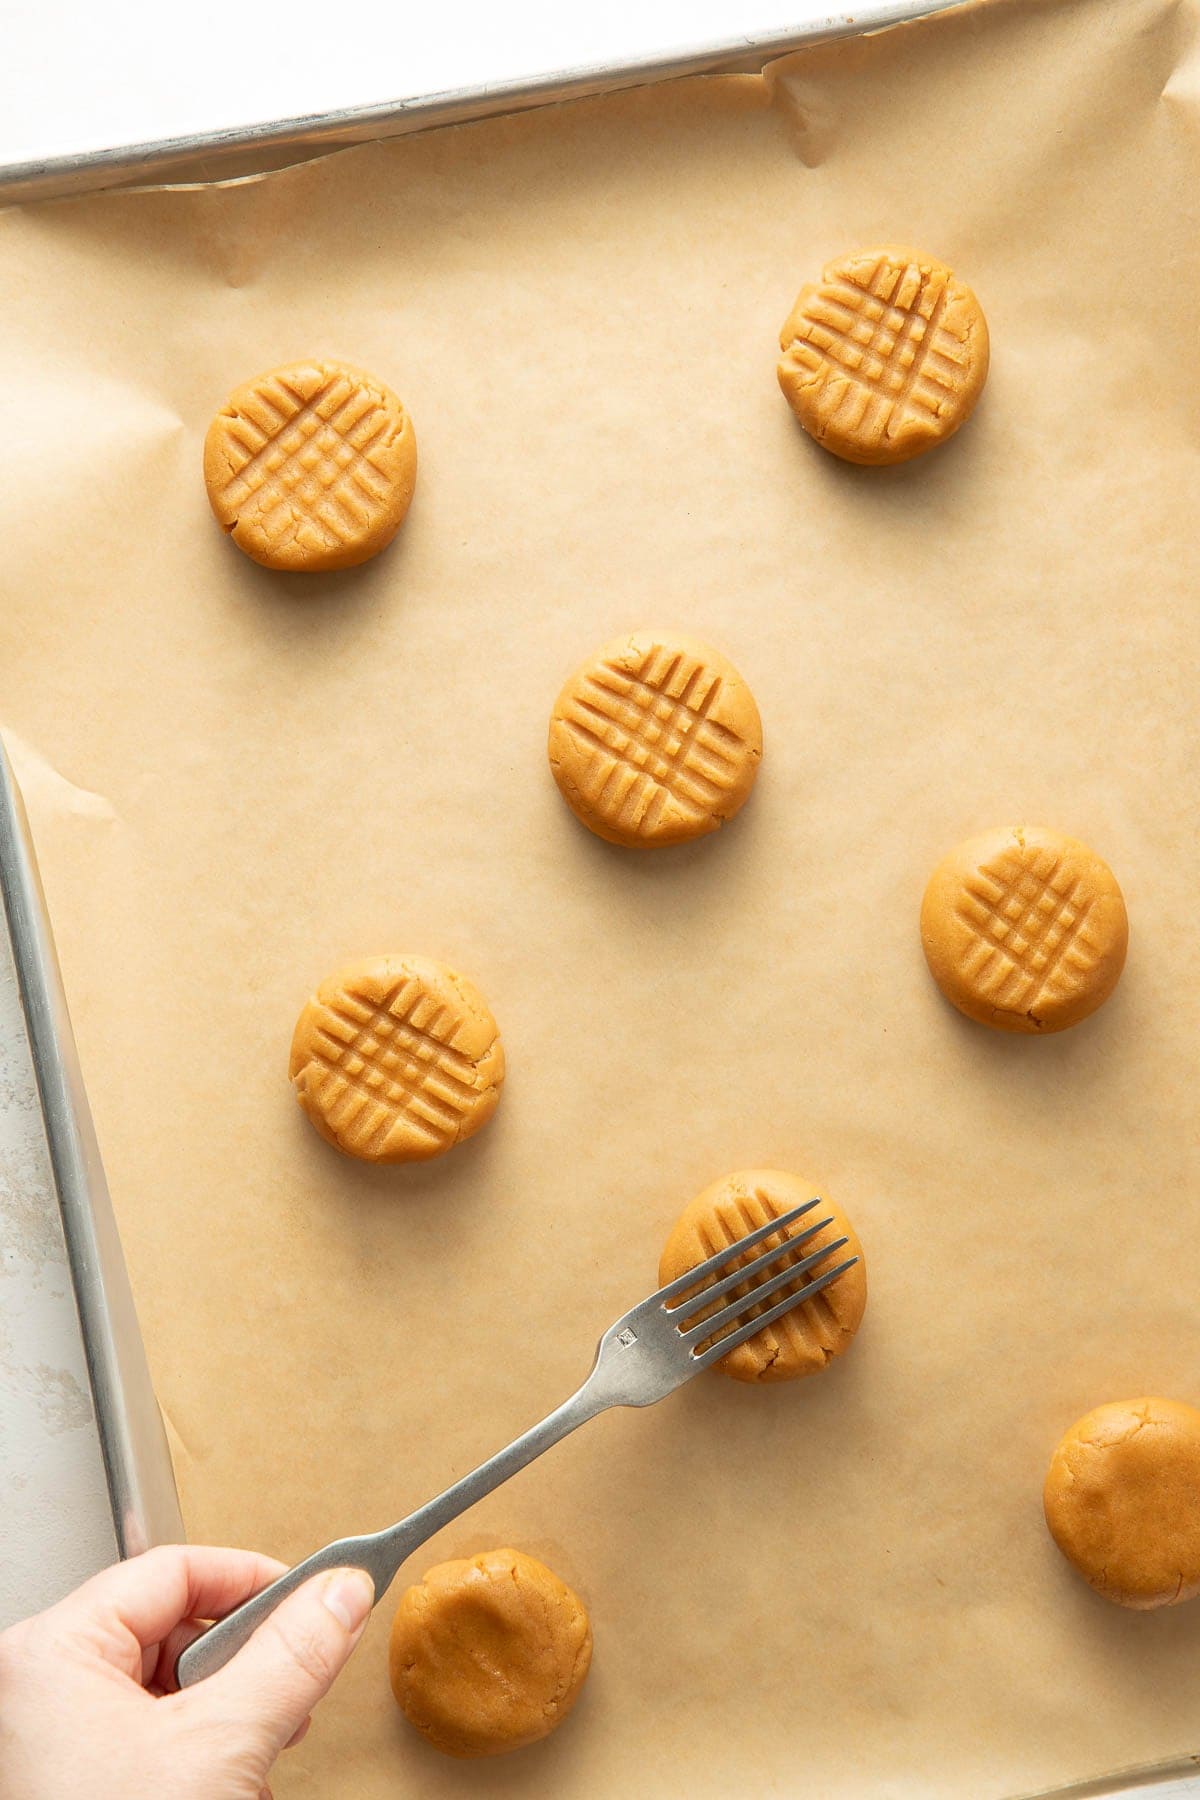
Curious about the fork marks? Because the dough is denser than most cookies, pressing them helps to bake more evenly. 😏
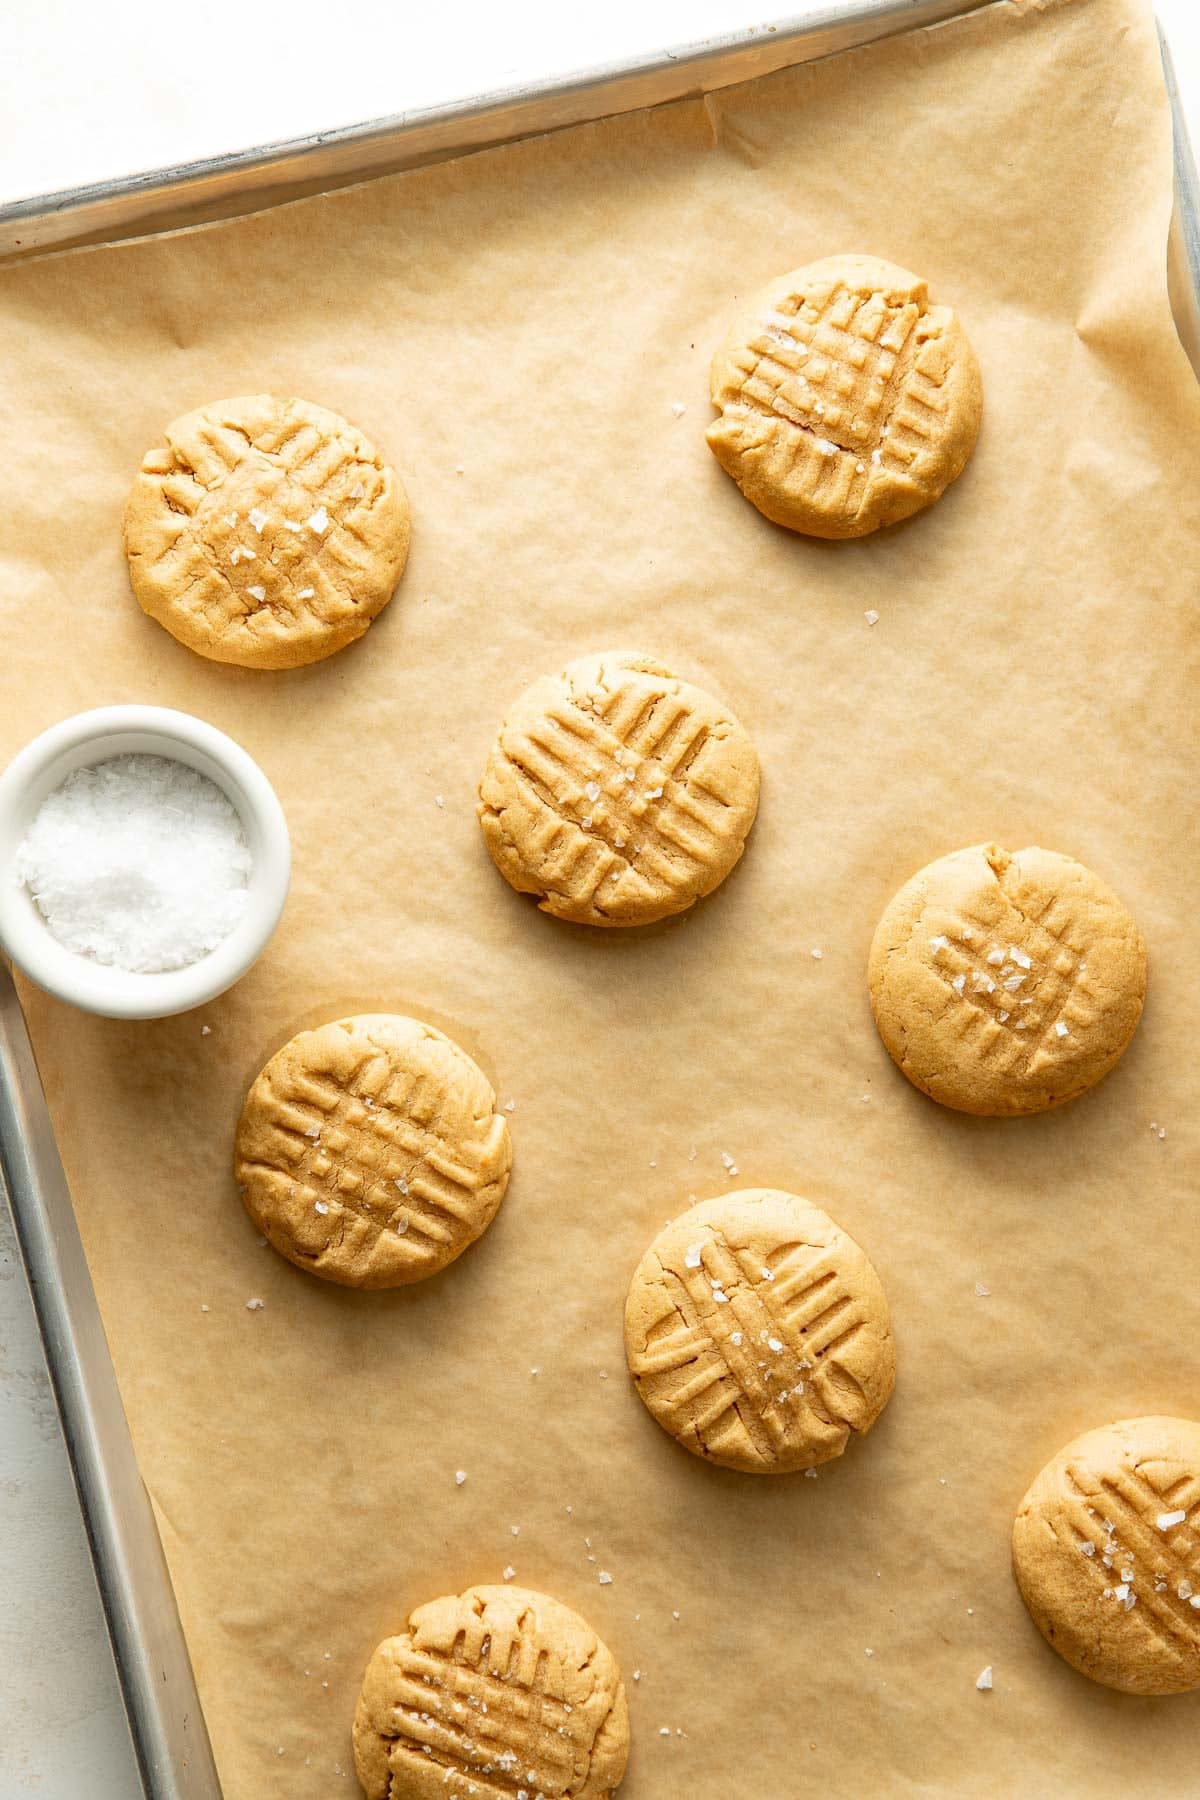
You’ll know the cookies are ready when they puff up and appear golden brown along the edges. The centers will remain just slightly underdone. This is key! Don’t worry, they’ll finish setting as they cool.

Serve warm with a cold glass of milk (classic for a reason!), or alongside coffee or espresso. These would be a fantastic addition to holiday cookie boxes (for more inspo, browse all of my bakery-style cookie recipes!).
For a more elevated dessert, sandwich vanilla ice cream between two cookies or crumble them over ice cream. My kids love doing this!
Trust me, once you make these, you won’t be reaching for another peanut butter cookie recipe anytime soon. 😉 Can’t wait to hear what you think!
And make sure to sign up for our newsletter and follow along on Instagram, TikTok, YouTube, Pinterest, and Facebook for more Well Seasoned recipes! Don’t forget to tag us on social channels when you make a recipe at #wellseasonedstudio and upload your photos below! We love seeing what you’re up to in the kitchen!
Tell Us What You Think!
If you make this recipe, don’t forget to leave a review and rating—we value your feedback and it helps us keep creating (and sharing!) free recipes. Your support means the world!
Rate this Recipe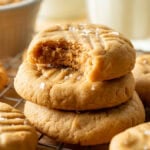
Perfectly Chewy Peanut Butter Cookies
Equipment
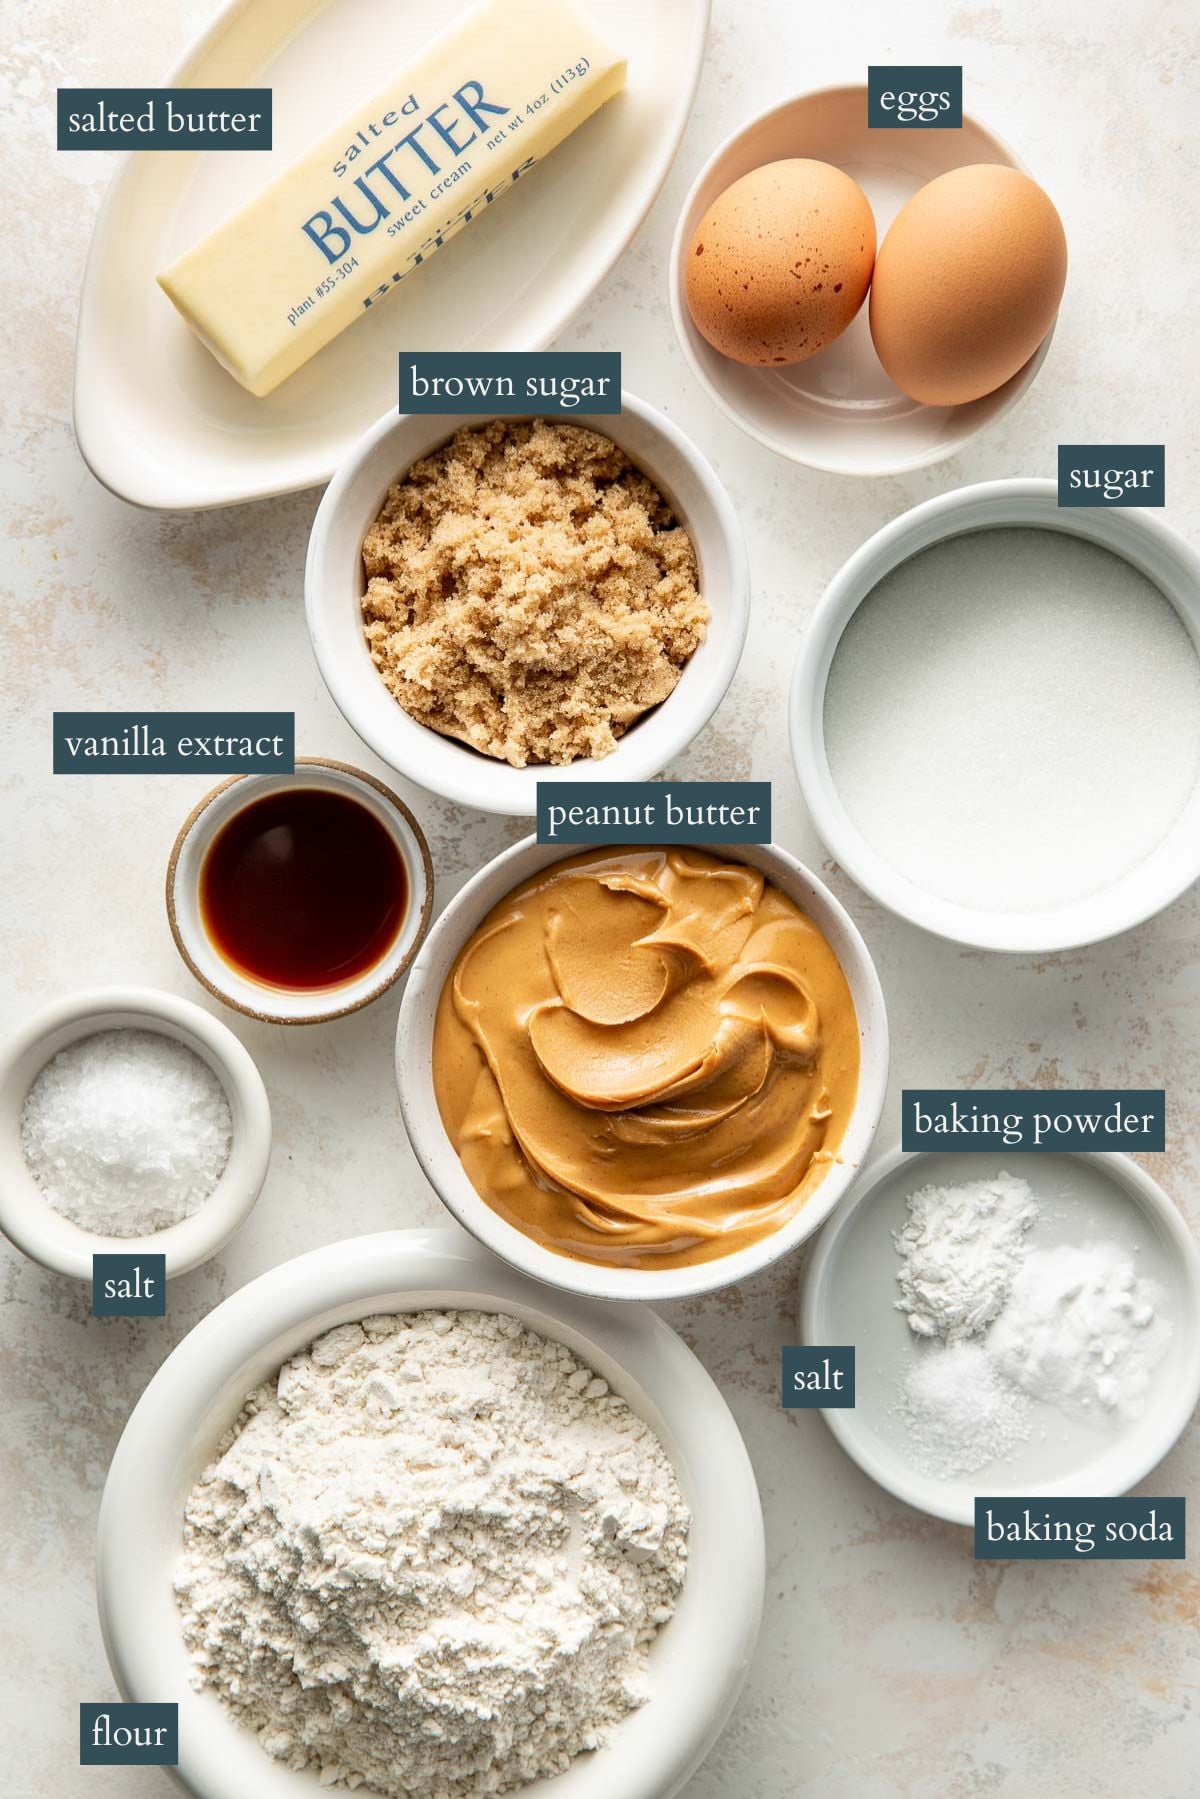
Ingredients
- 1½ cups (180g) all-purpose flour
- ¾ tsp baking soda
- ½ tsp baking powder
- ¼ tsp kosher salt
- ½ cup (113g) salted butter, room temperature
- 1¼ cup (310g) creamy natural peanut butter
- ½ cup (105g) light brown sugar
- ½ cup (100g) granulated sugar
- 1 large egg
- 1 large egg yolk
- 2 tsp pure vanilla extract
- Flaky sea salt
- Optional add-in ideas: chocolate chips, chocolate shavings, peanut butter chips, mini peanut butter cups, or chocolate sprinkles
Instructions
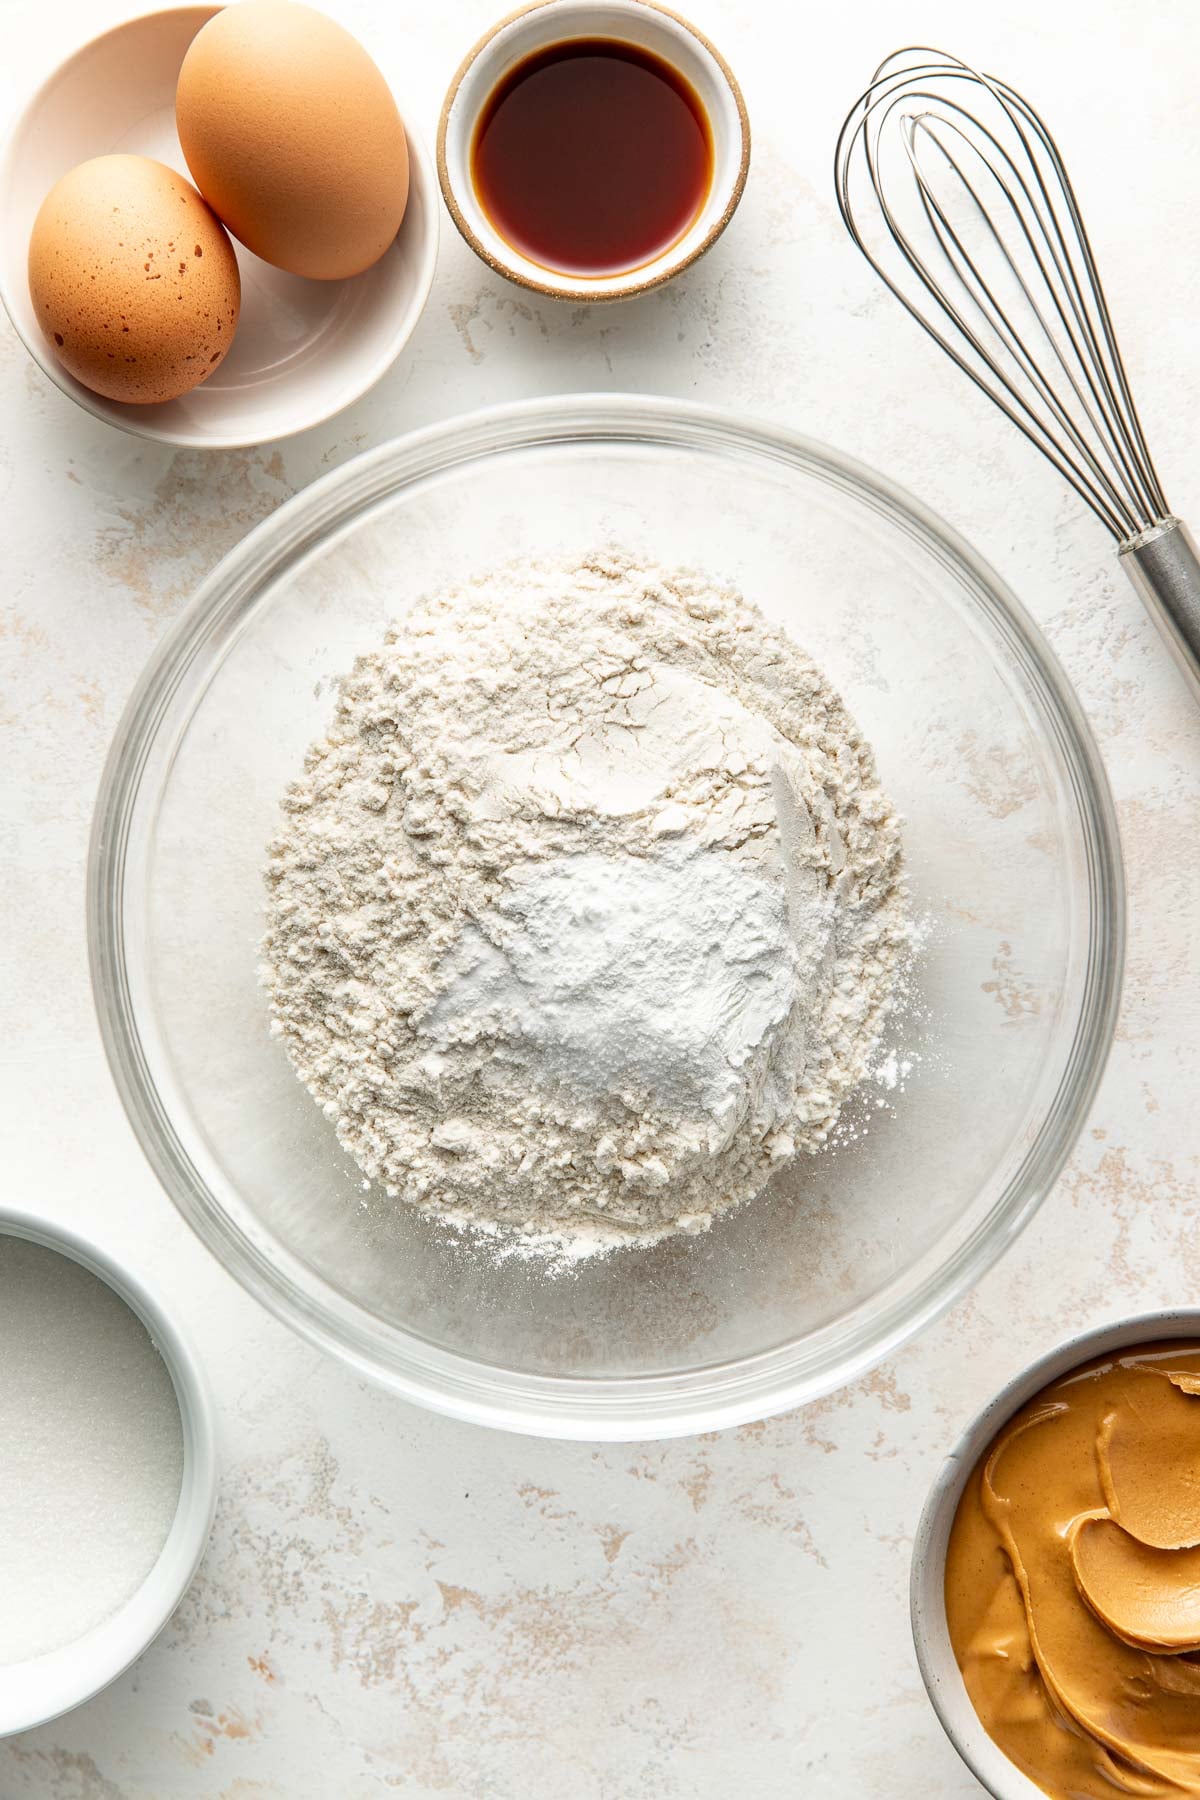
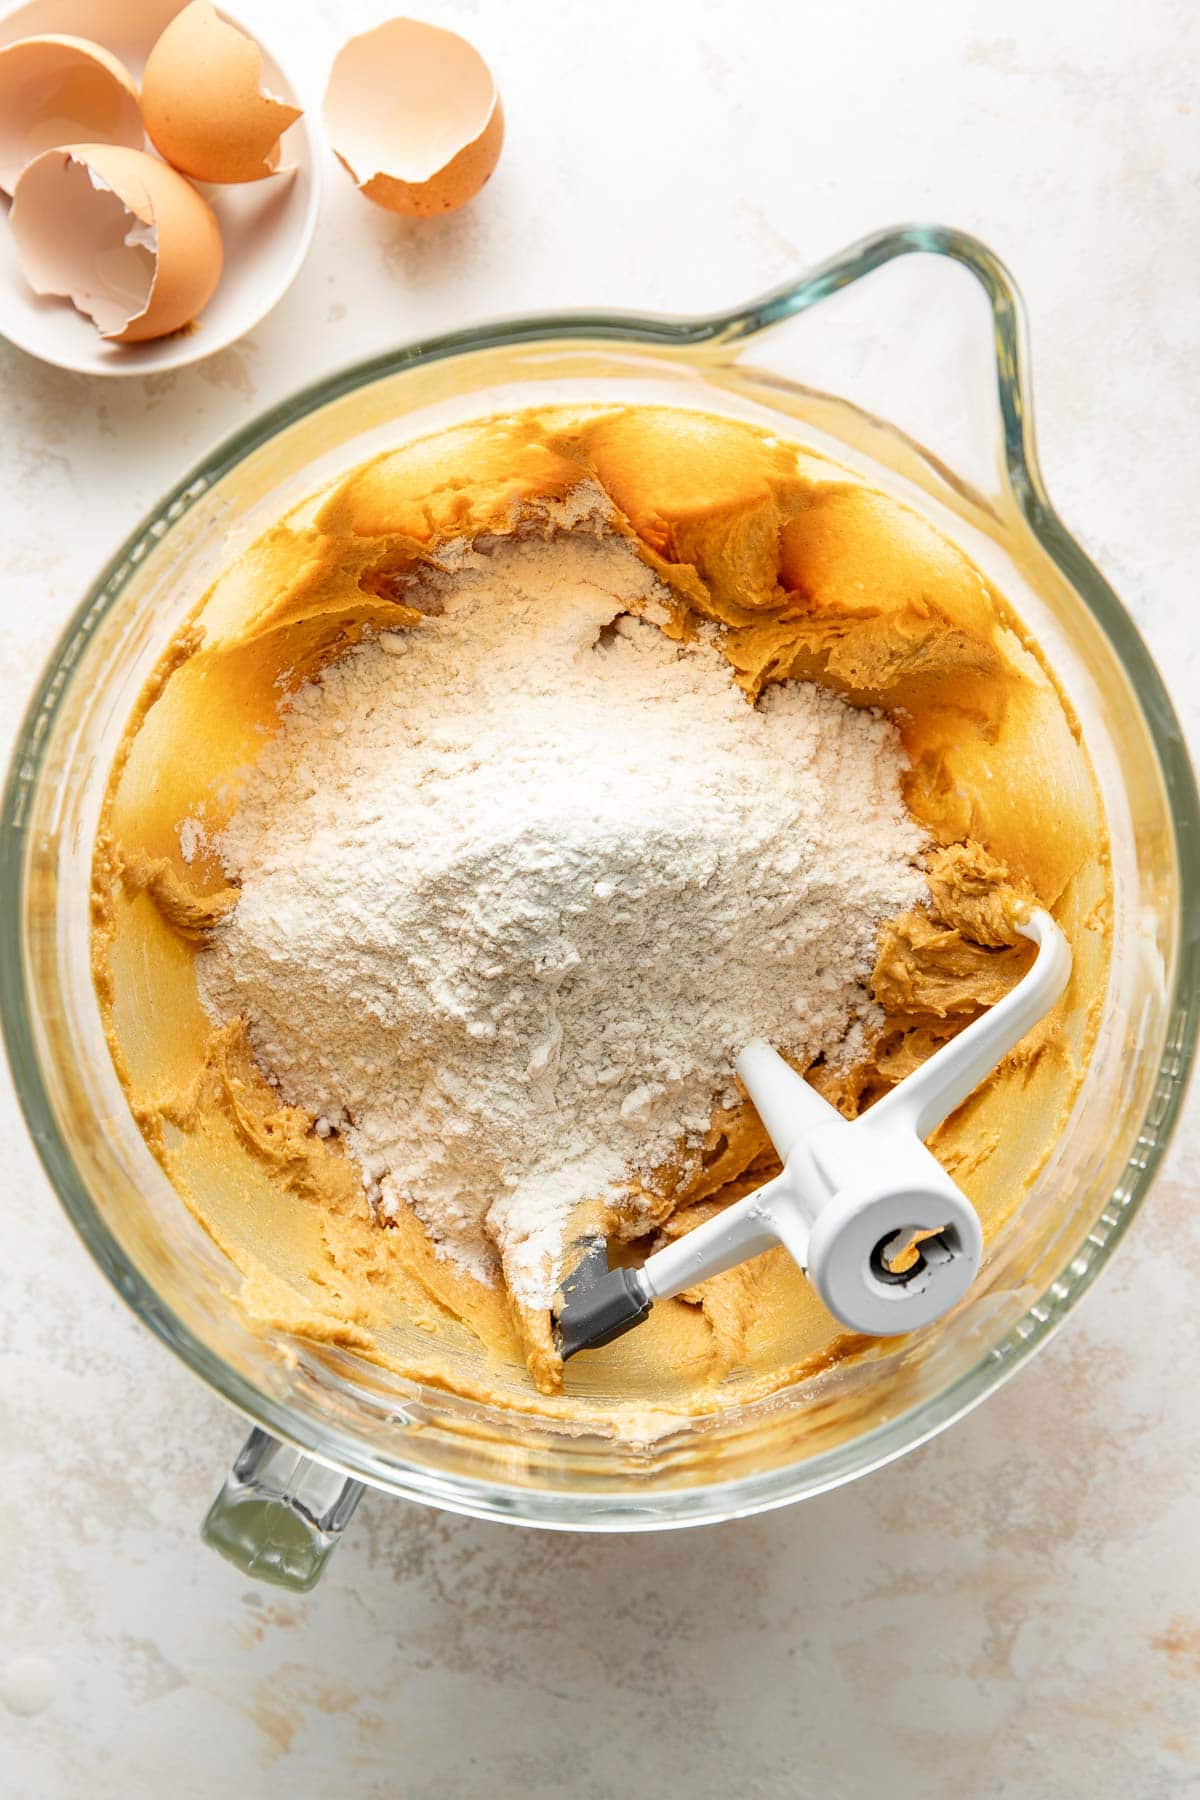
- Mix dry ingredients. In a large bowl, whisk together 1½ cup (180g) all-purpose flour, ¾ tsp baking soda, ½ tsp baking powder, and ¼ tsp kosher salt. Set aside.
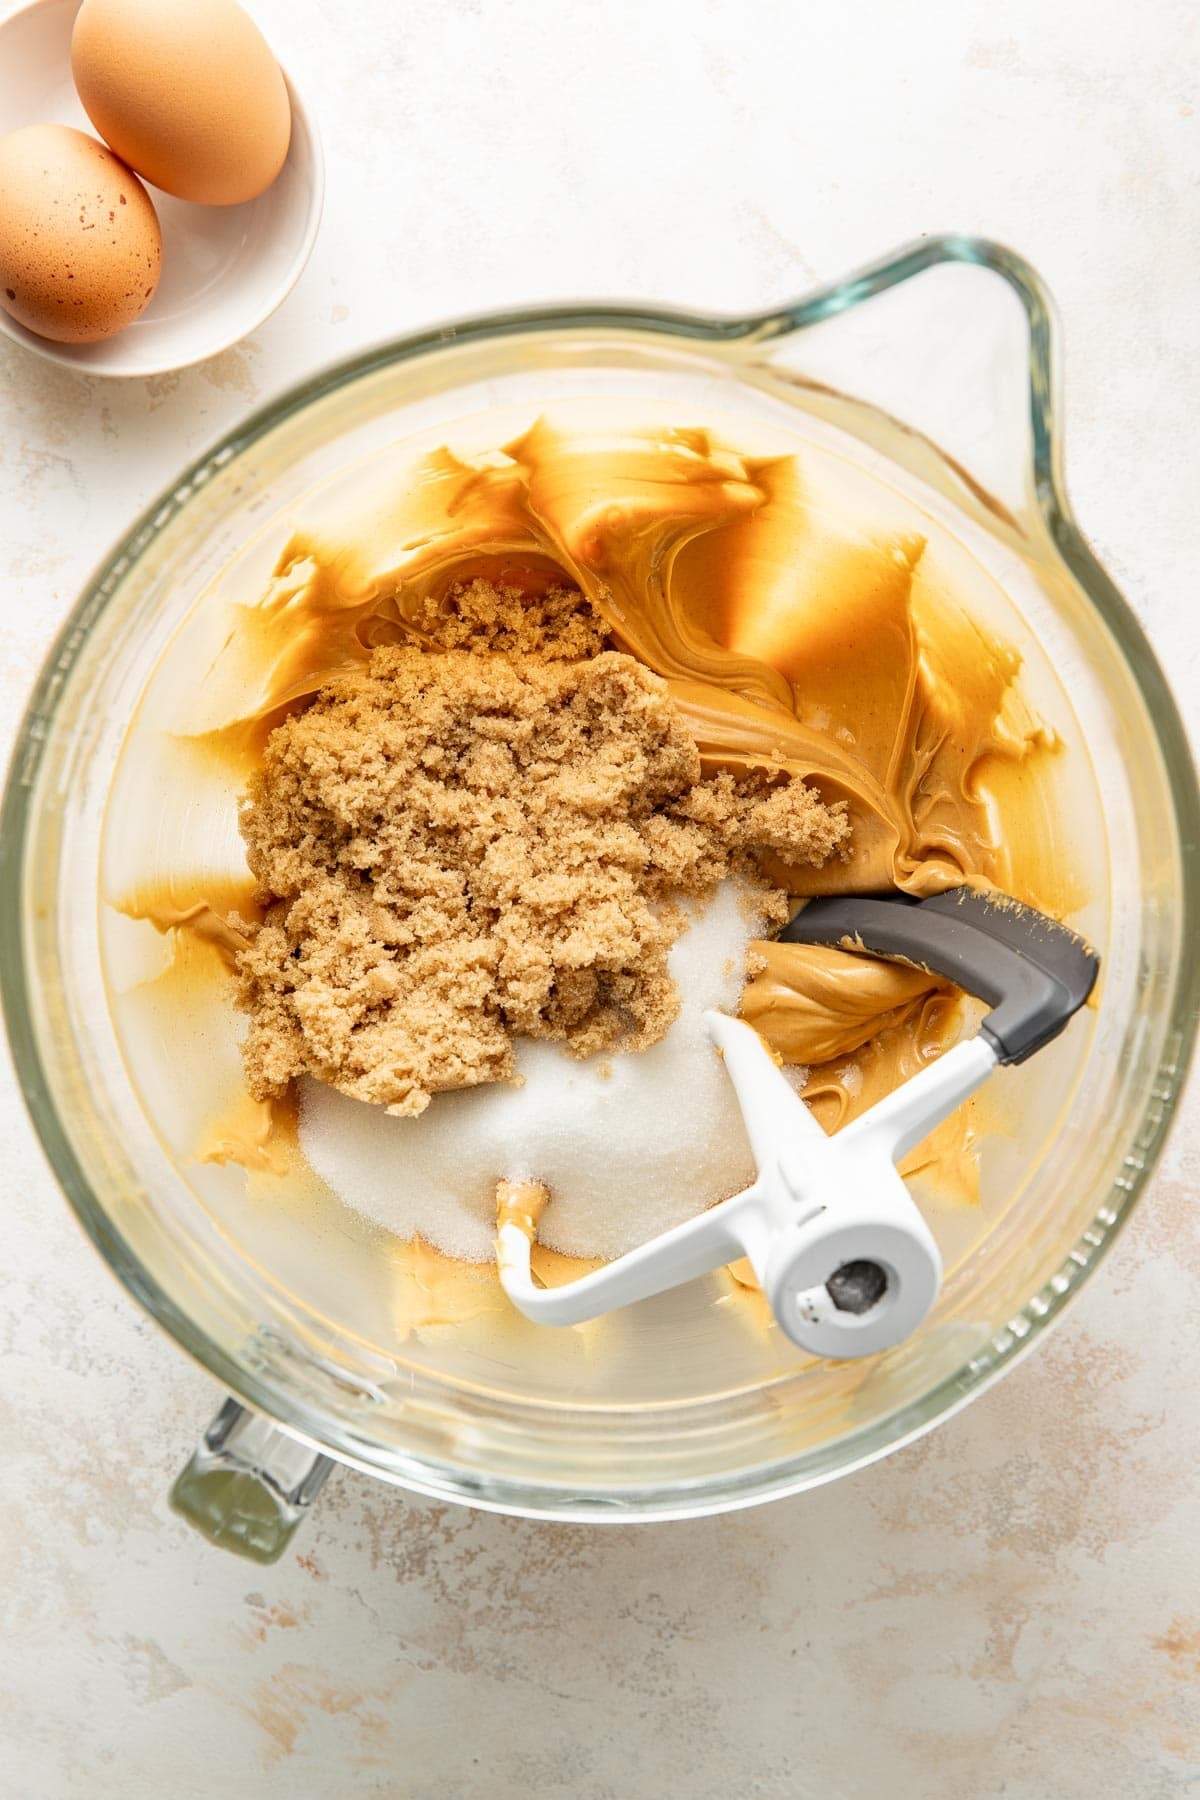
- Cream butter and peanut butter. In the bowl of a stand mixer, combine ½ cup (113g) softened salted butter and 1¼ cup (310g) creamy natural peanut butter. Beat on medium speed until smooth.
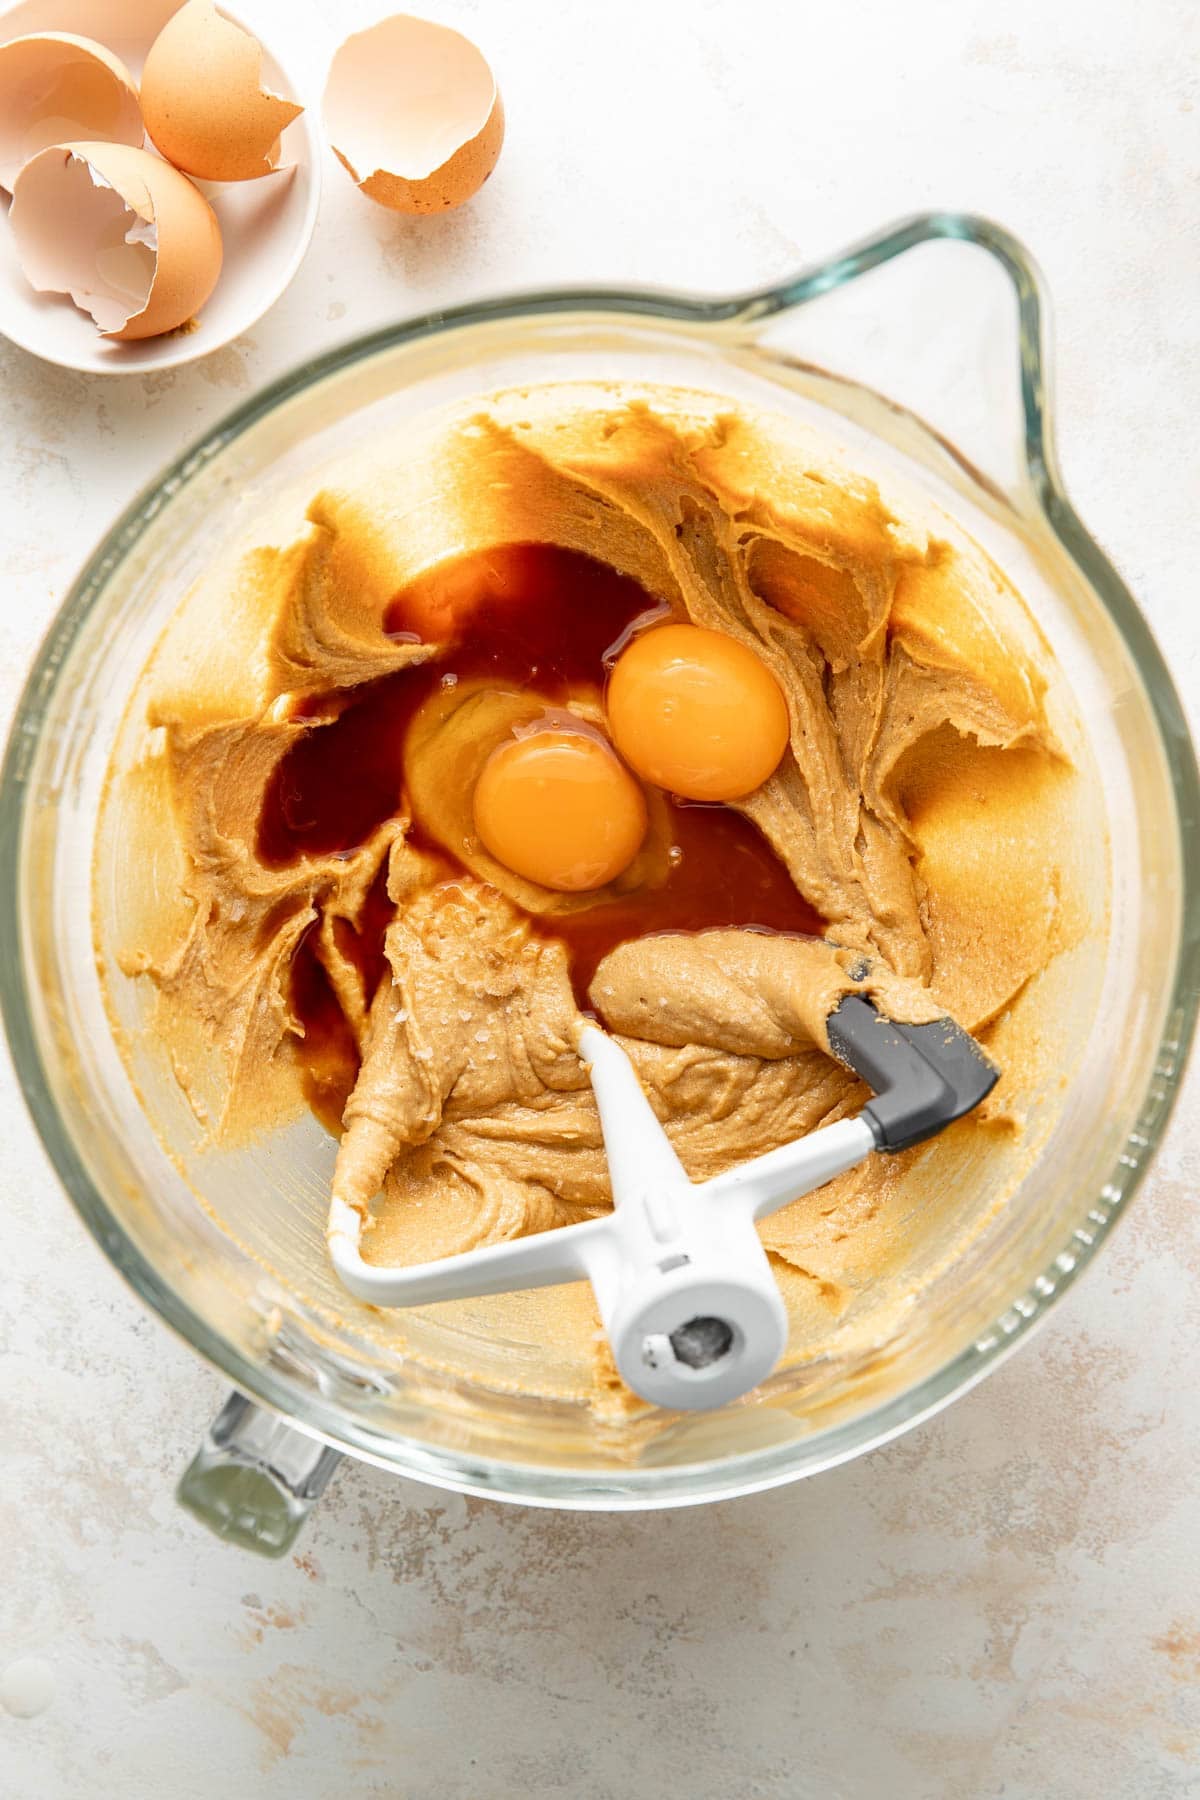
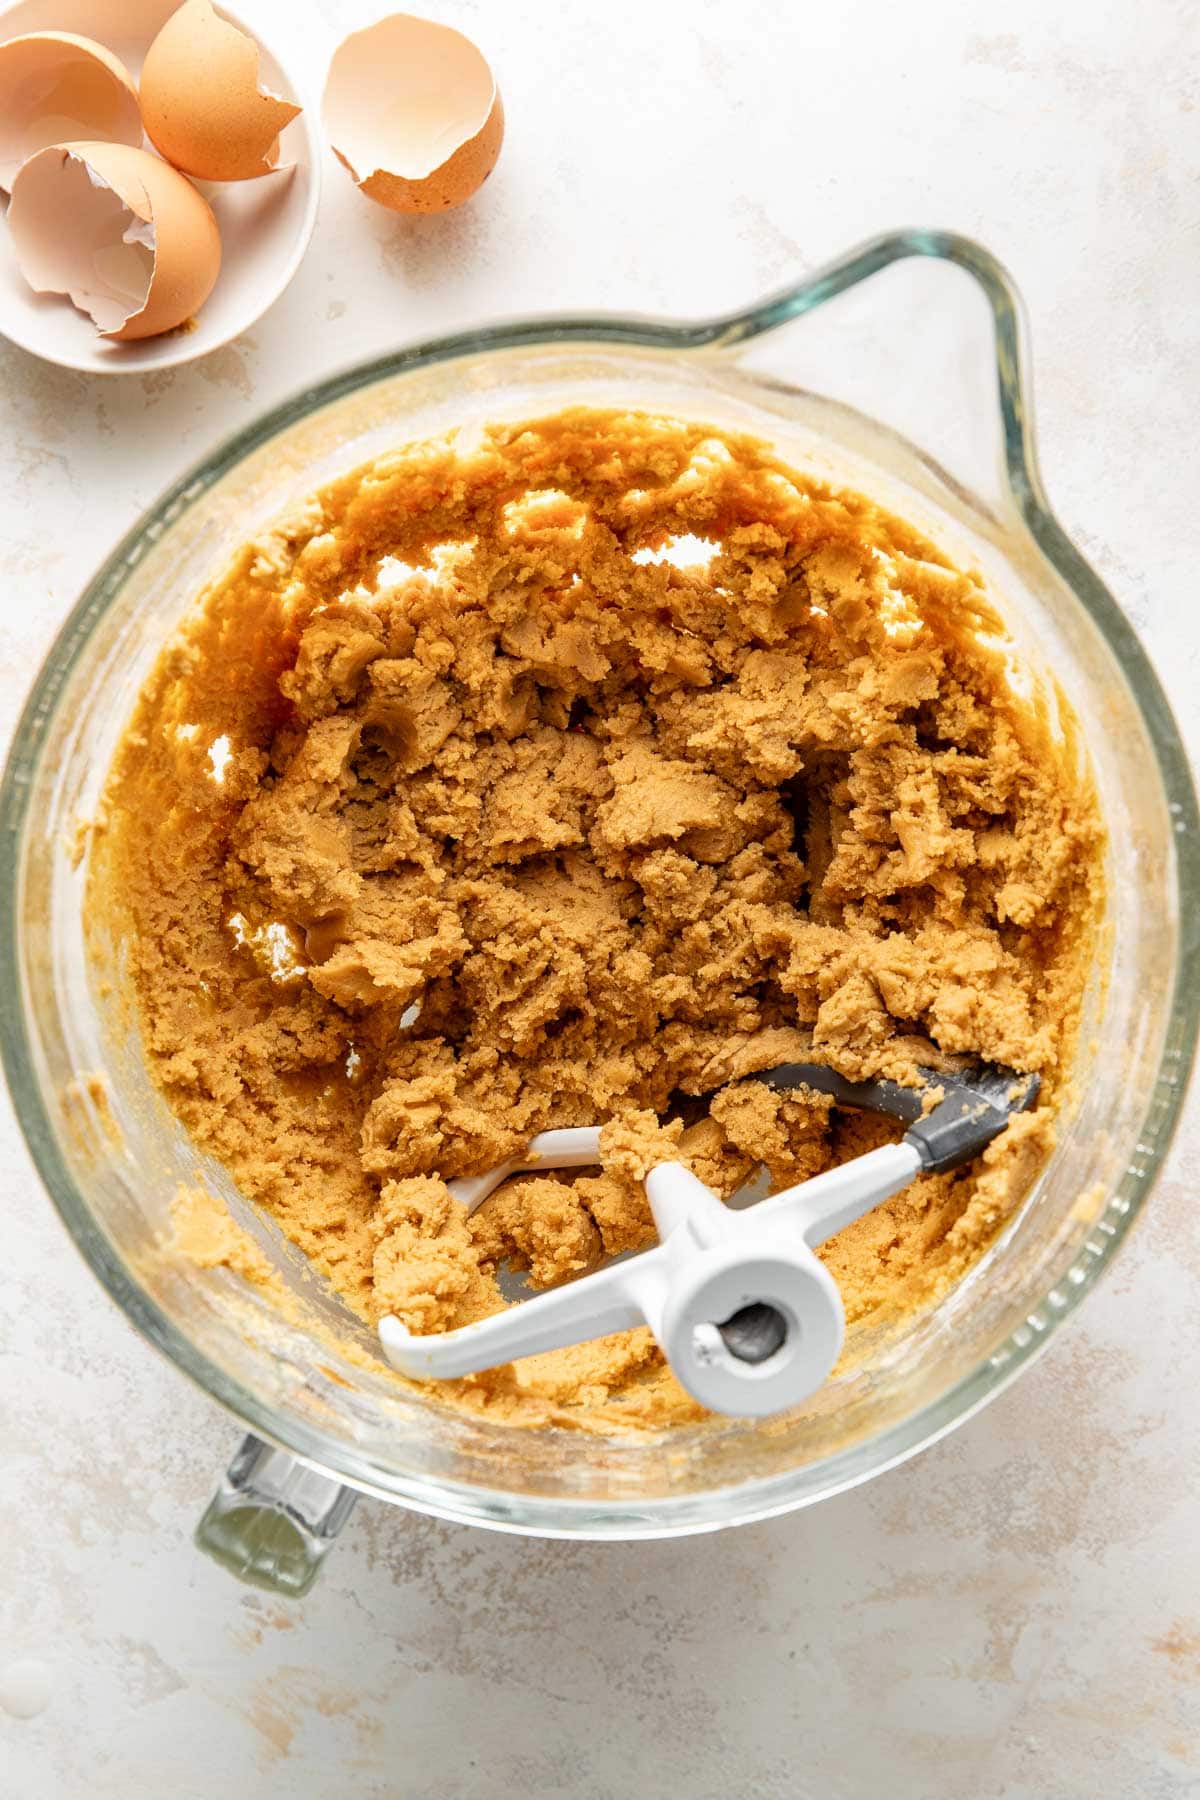
- Add sugar. Add ½ cup (105g) brown sugar and ½ cup (100g) granulated sugar, then continue to beat on medium speed for 1-2 minutes. Next, add 1 egg, 1 egg yolk, 2 tsp vanilla extract, and a pinch of flaky sea salt. Beat until fully incorporated, about 1 minute more, scraping down the sides with a spatula as needed.
- Combine wet and dry ingredients. All at once, add the dry ingredients to the wet ingredients, then mix on low speed (any higher and you’ll have flour flying all over the place) until well combined. If adding mix-ins, do this when just a few streaks of flour remain.
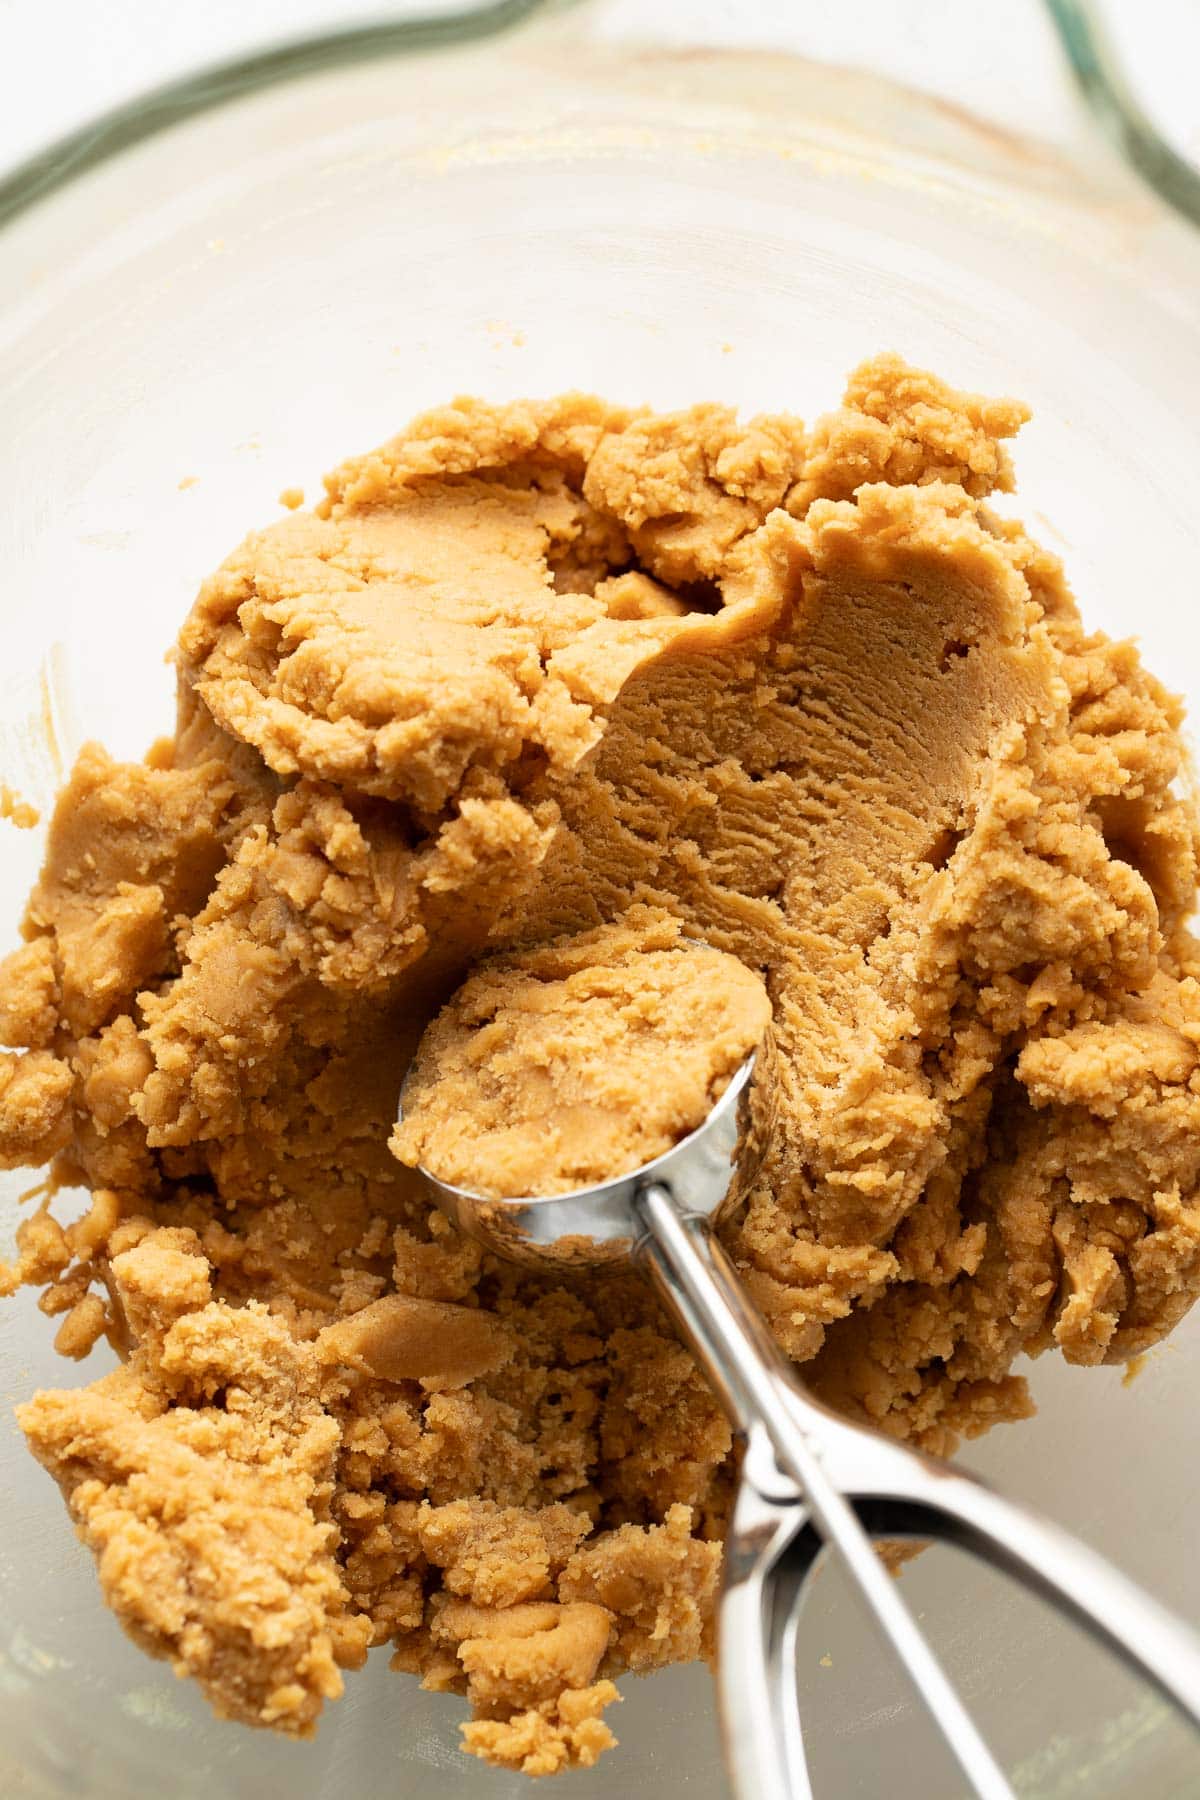
- Chill the dough. Cover with plastic wrap or transfer to an airtight container. Refrigerate for at least 1 hour or overnight. If you skip this step, the cookies will spread more.
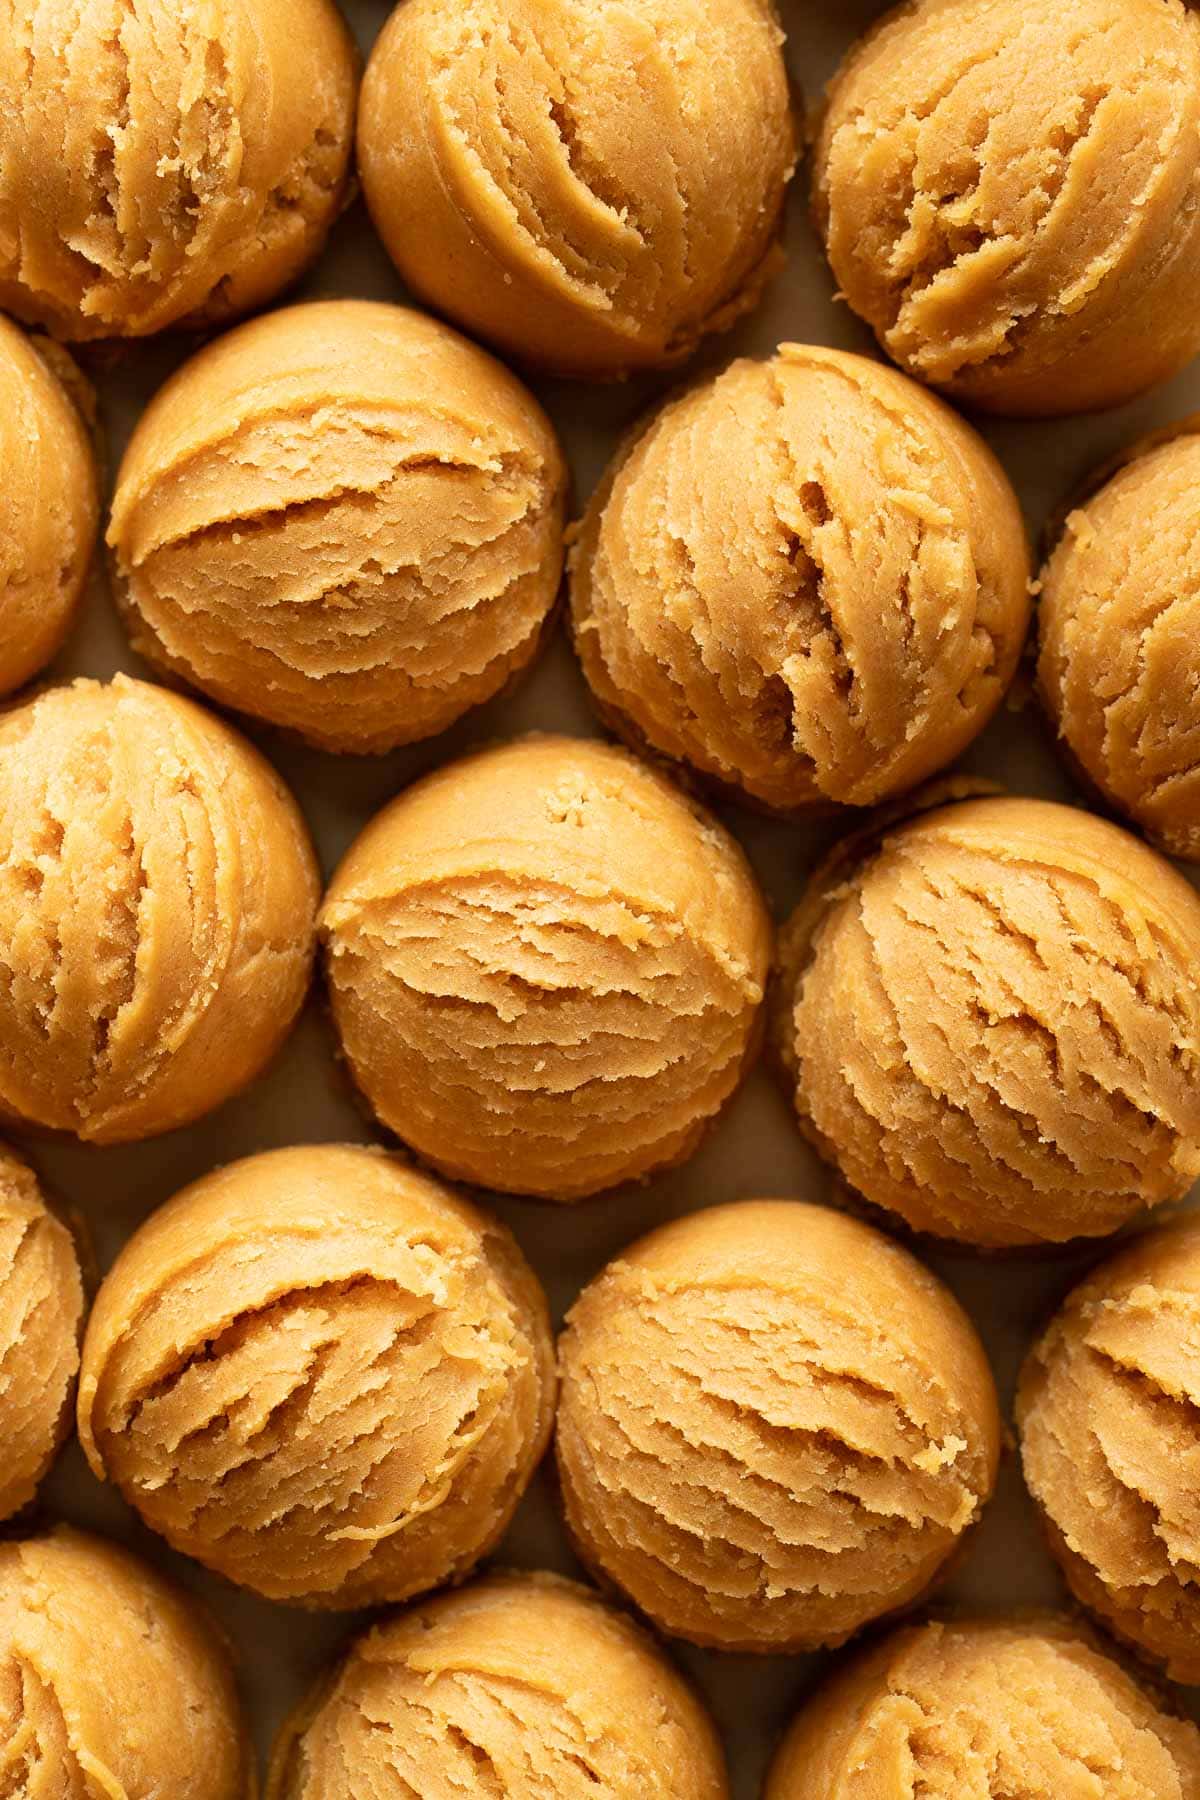
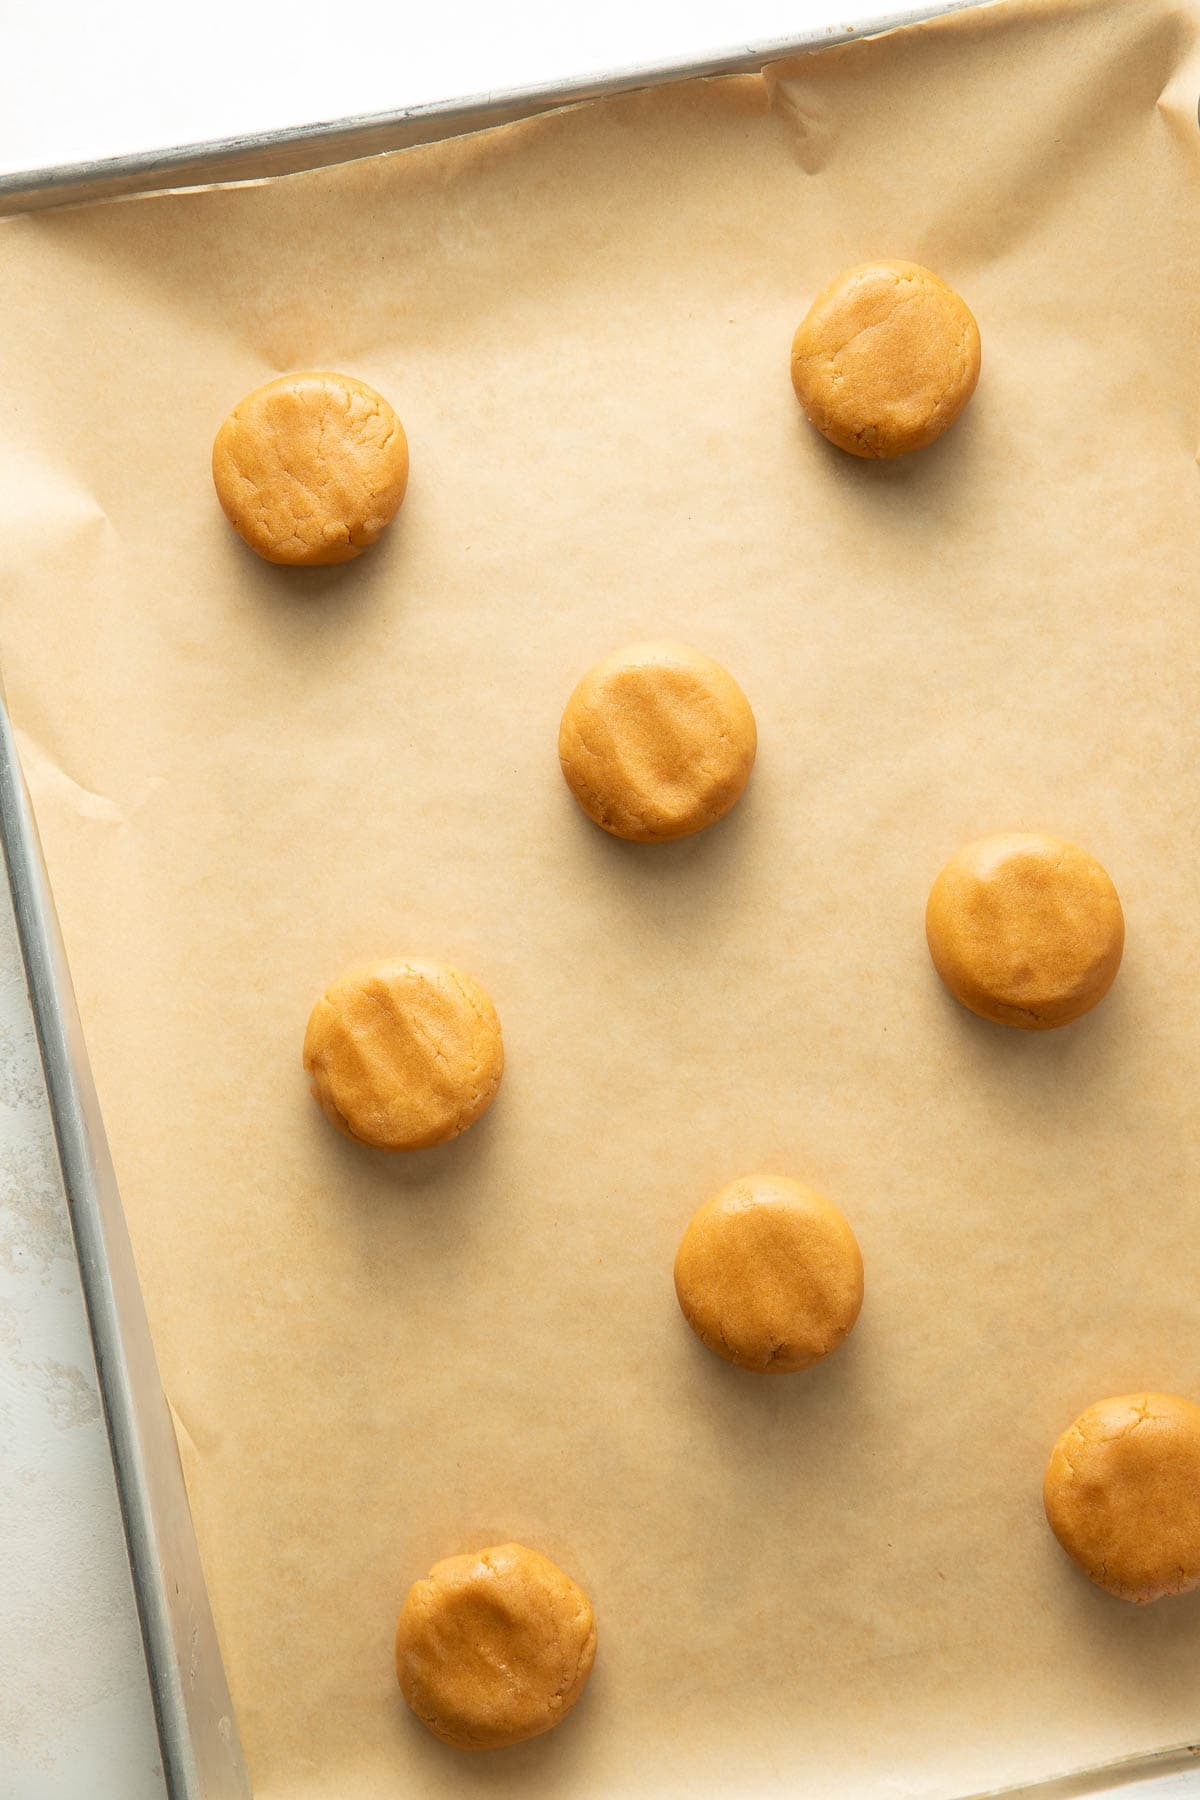
- Prepare the cookies. Preheat an oven to 375°F (190°C), then line two rimmed baking sheets with parchment paper. Use a standard cookie scoop to portion out cookie dough, then roll each into round balls. Use your hands to flatten them slightly into disks, then place on the prepared baking sheet, leaving at least two inches in between. I recommend 12 cookies per sheet pan. Use a fork to gently press down and create a crosshatch pattern on each cookie.
- Bake. Transfer to the oven and bake until the cookies are golden brown along the edges and the centers look just barely cooked, about 8-10 minutes. If you want, sprinkle each with a little flaky sea salt. Cool for 5 minutes on the sheet pan, then transfer to a wire rack. Enjoy warm or cool completely. These are the absolute best!
Notes
- Make-ahead: The dough can be made up to 2 days in advance and stored in the refrigerator.
- Storage: Store baked cookies in an airtight container for up to 4 days. I never refrigerate ’em. They stay soft and chewy at room temp.
- Freeze unbaked dough balls or baked cookies for up to 2 months. Bake from frozen, adding 1-2 minutes to the bake time.
- Gluten-free: Use a 1:1 gluten-free flour blend.
Nutrition
Photography by Megan McKeehan.


Let us know your thoughts!