


Allow me to introduce you to my absolute favorite holiday cookie: Italian rainbow cookies! They’re an Italian-American invention, created by immigrants in New York as a nod to the Italian flag. I think my family likes them so much because they’re actually cake. You know… disguised as cookies. 😏
I’ve been making this tri-color cookie recipe for over a decade at this point—you might know them as Venetian cookies, seven layer cookies, or Italian flag cookies, but whatever you call them, they are so worth the effort. And truly, they’re just as good as cookies from your favorite Italian bakery.
My Other Top 3 Foolproof Holiday Bakes
- This ultra rich, creamy pecan pie cheesecake!
- A perfect, decadent Italian tiramisu—is anything better?!
- My flourless chocolate cake with a crinkly top!

What’s In Italian Rainbow Cookies?
There’s surprisingly few ingredients in these Italian cookies.
You’ll need eggs (separate the whites and the egg yolks), sugar, almond paste, pure almond extract, butter, flour, salt, food coloring, and raspberry preserves. The chocolate shell that coats the layered cookies is made with melted semi-sweet chocolate.
This recipe is made easier with a stand mixer, but you can whip the egg whites by hand if you’re feeling strong. 💪🏻

Is Almond Paste Necessary? Yes.
Sorry, but you literally cannot make this recipe without almond paste. What you can substitute, if needed, is the jam. In fact, lots of rainbow cookies are made with both seedless raspberry jam and apricot preserves (one layer of each). Personally, I’d be game to try them with homemade strawberry preserves!
How To Make Rainbow Cookies
Be sure to read through the entire recipe before you begin (always a good habit, but especially important when baking). Don’t let the length of the instructions intimidate you—the effort is well worth it. You’ll end up with nearly 100 beautiful cookies, plus plenty of delicious scraps to snack on as you go! Here’s the quick overview:
- Divide the batter evenly into three large bowls.
- Tint two portions with food coloring—one red, one green—mixing each until the color is uniform and vibrant, while leaving the third portion plain.
- Bake the layers one at a time. This is the trickiest part: carefully spreading the thin batter evenly over rimmed baking sheets. It takes patience, but those distinct, colorful layers are what make Italian tri color cookies so special.
Line each pan with a single sheet of parchment paper—no need to grease it!

Once the layers have cooled, spread half the jam between each layer.
When assembling, stack the layers with the yellow cake (plain) in the center so the finished cookie resembles the Italian flag: green, white, and red.

Store overnight in a refrigerator. It’s helpful to weigh down the cake with a couple heavy cookbooks on top (yes, really).
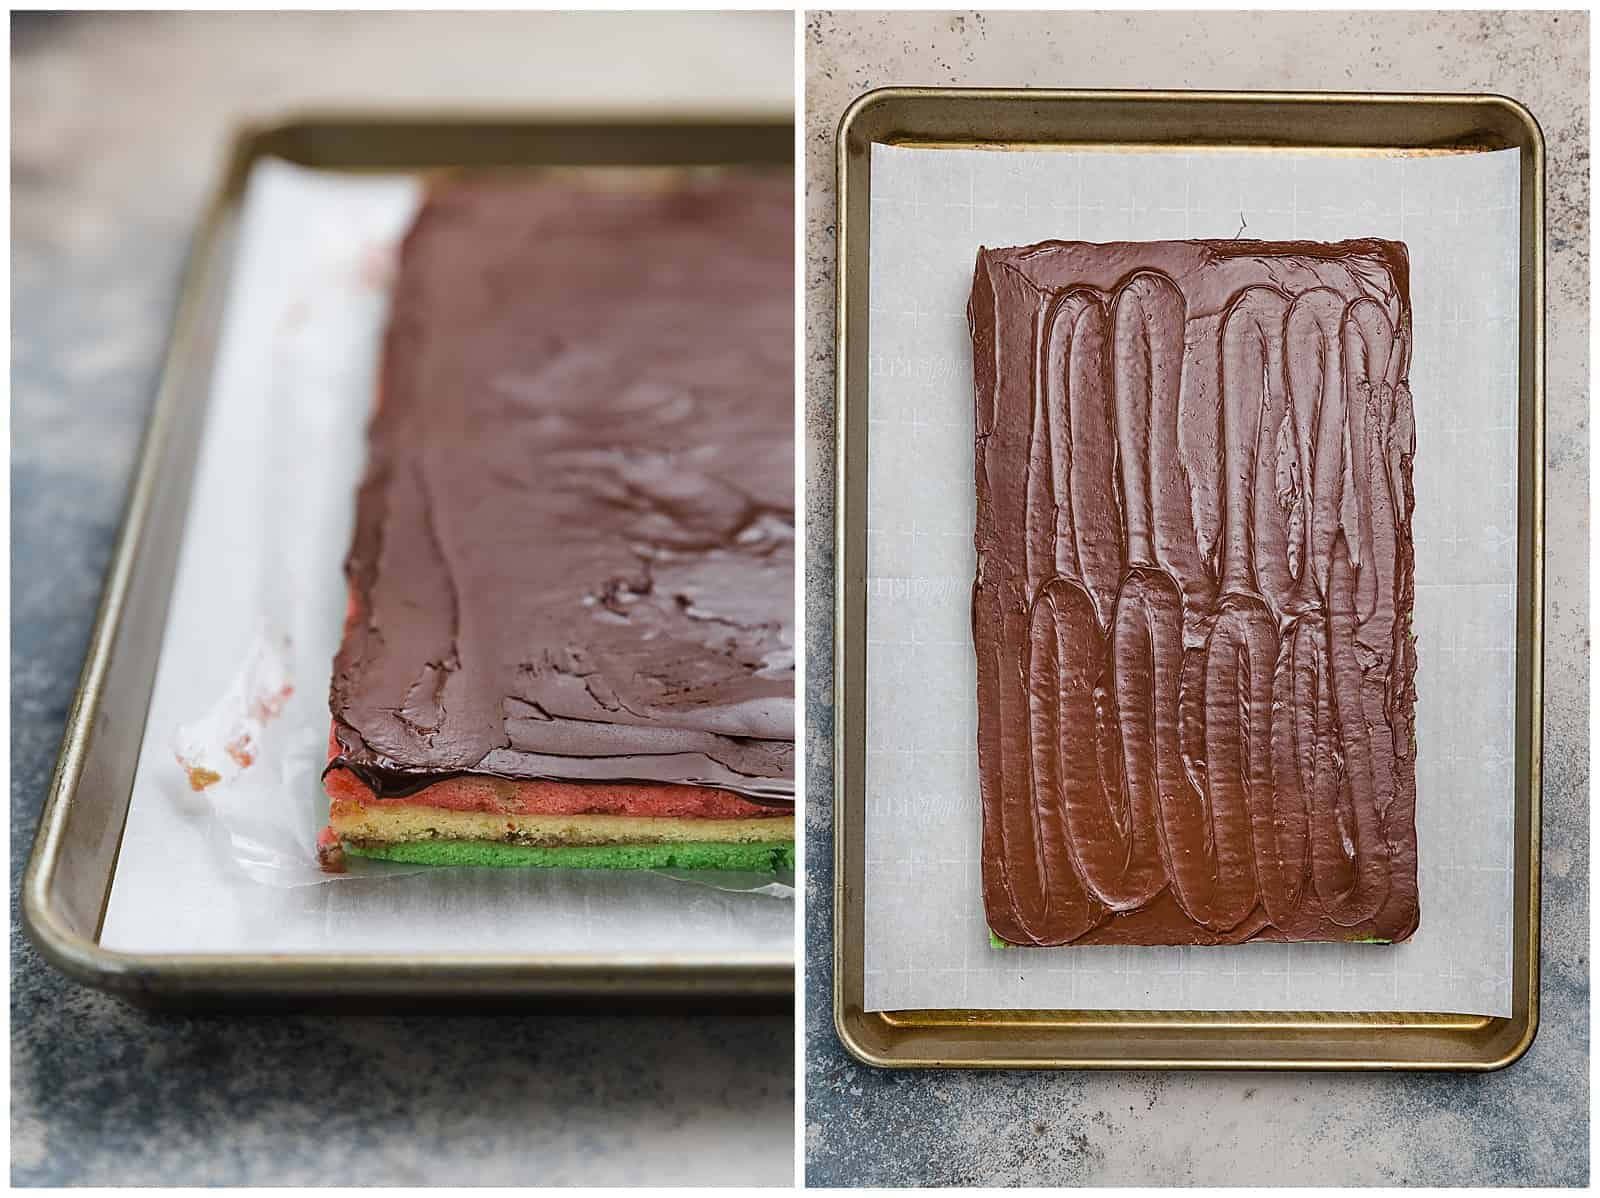
The next day, coat both sides with melted semisweet chocolate, then set until firm. Transfer the slab to a cutting board and slice into the most adorable bite-sized tricolore cookies you’ve ever seen. Whenever I make cookie boxes for family and friends during the holidays, these are always at the top of my must-bake list.
Storage Tips
Keep the cookies in an airtight container in the fridge for up to 1 week or freeze.
Just be sure to layer the cookies with sheets of parchment in between (so they don’t stick together). Allow them to defrost for 10-15 minutes before serving. I actually love to eat them straight out of the freezer—I know, I know.
Tips For Cutting Them Without Cracking The Chocolate
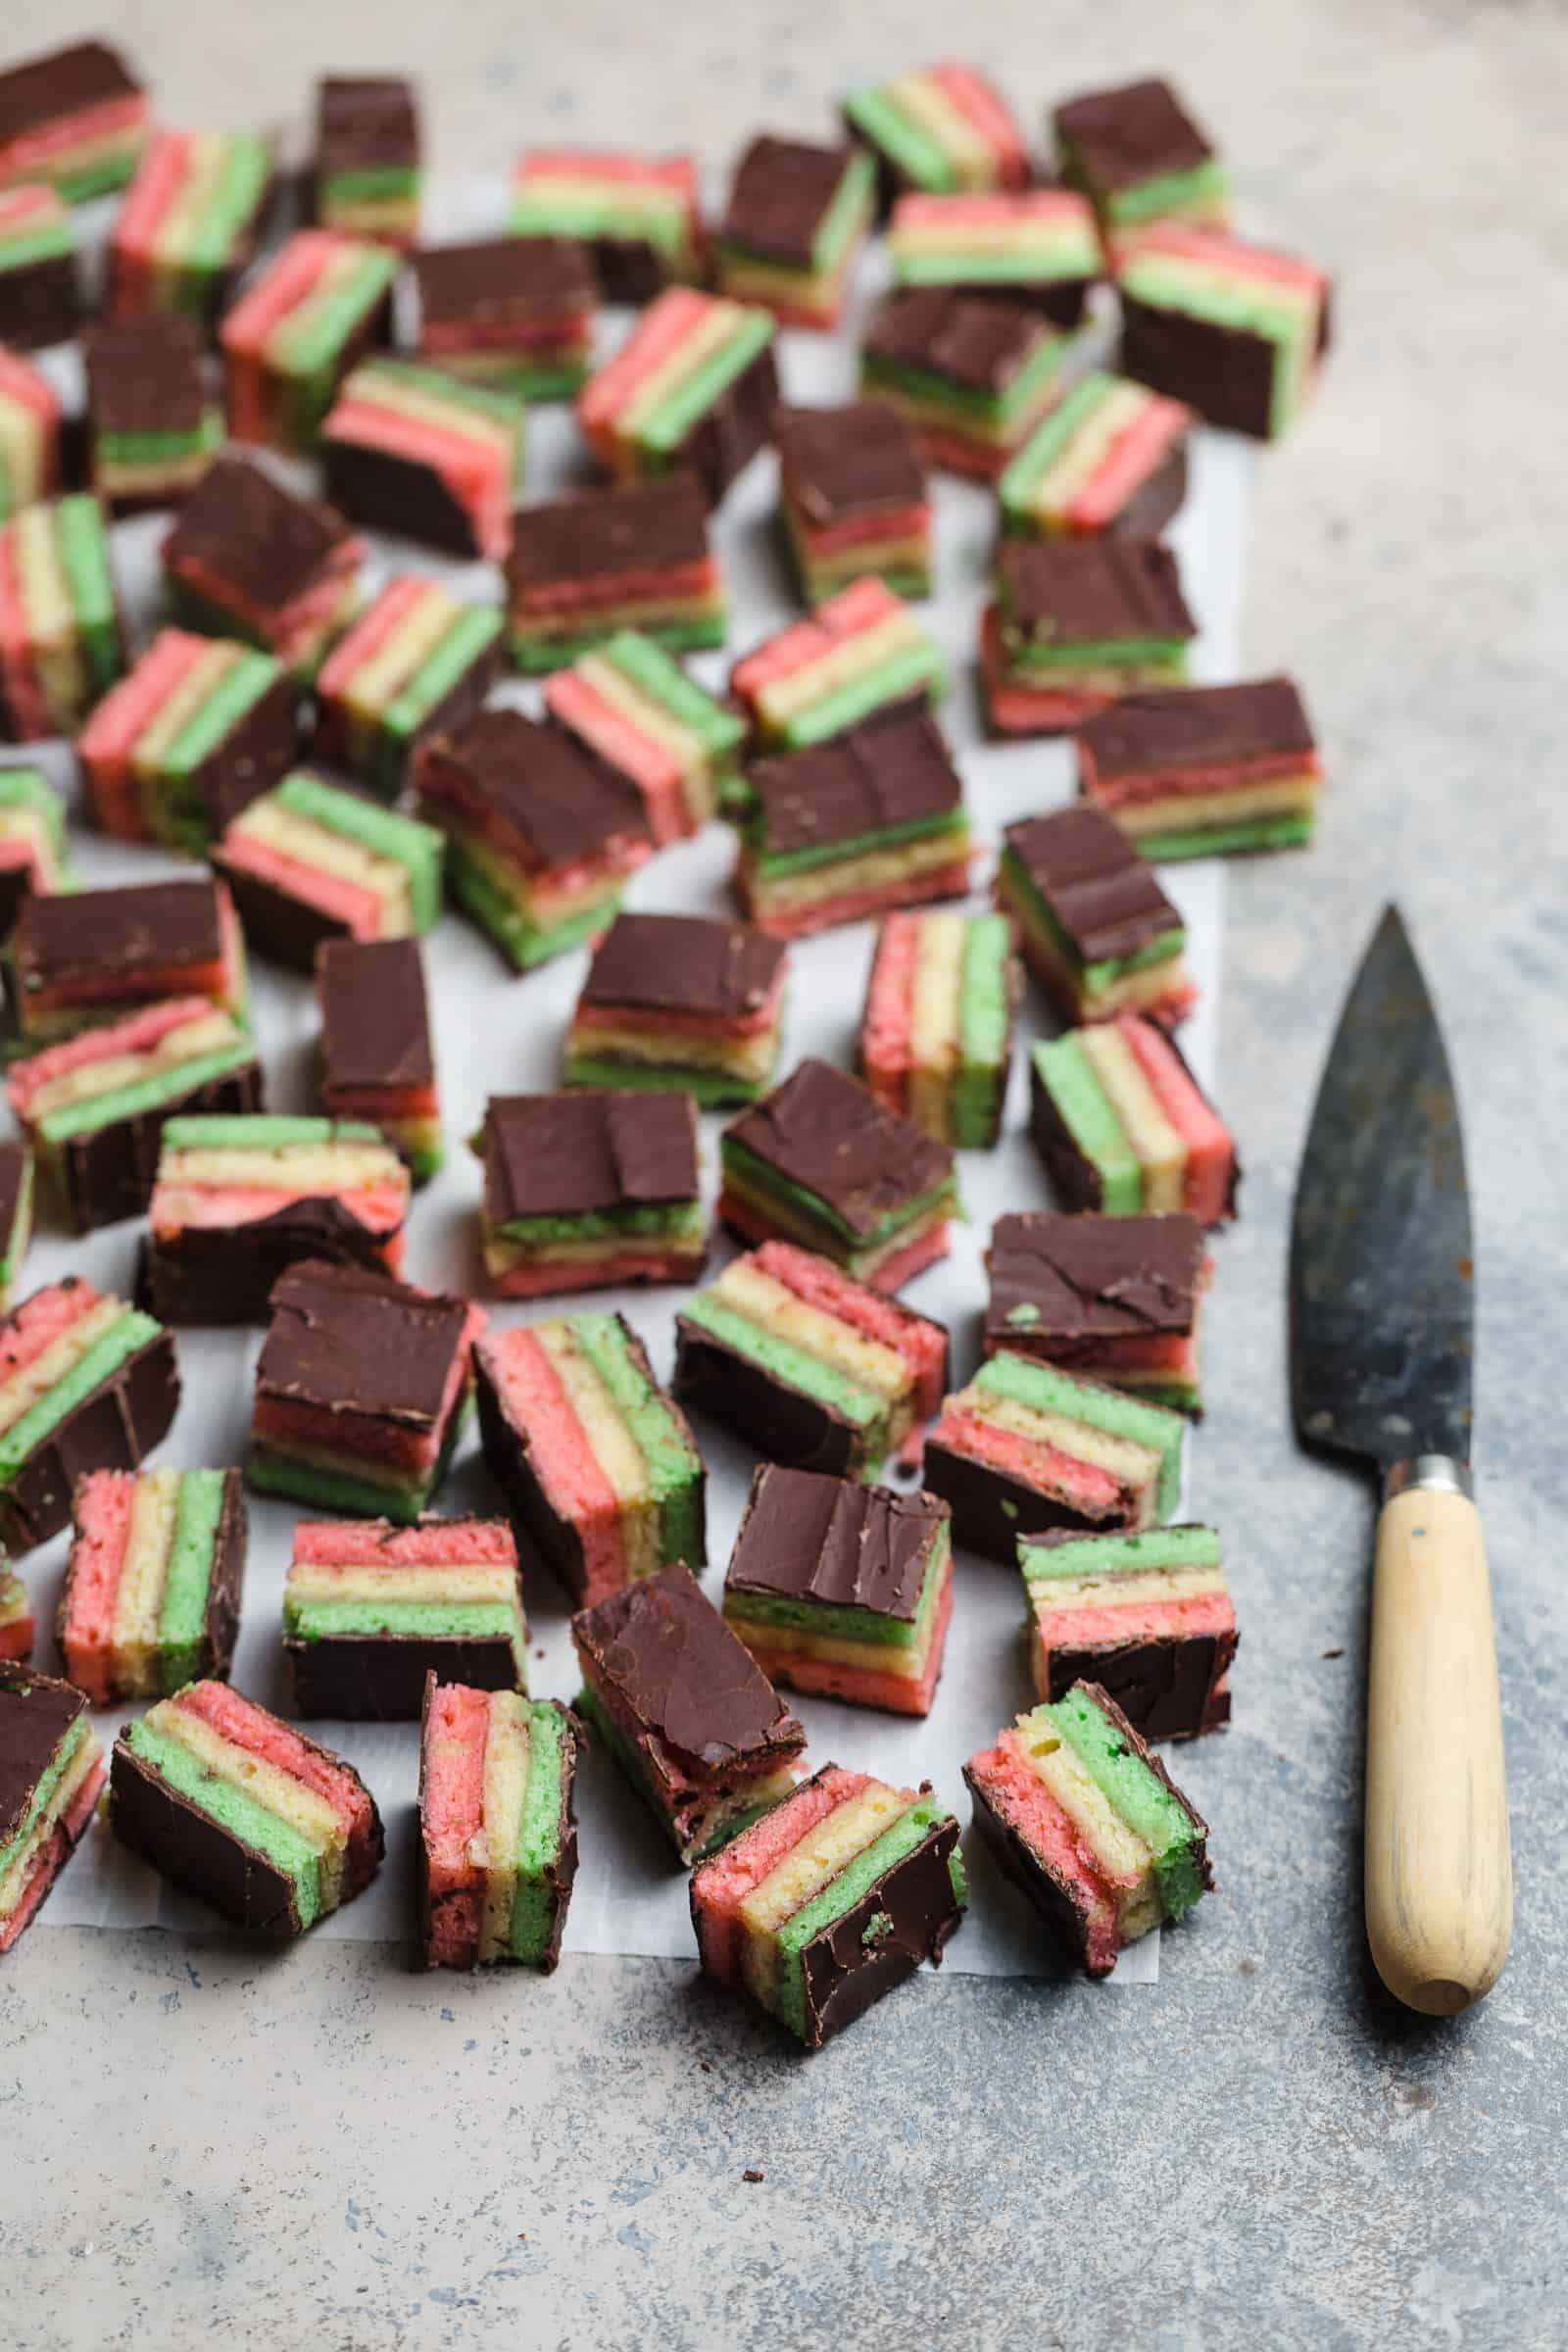
To make cutting rainbow cookies easier, you’ll want to use a serrated knife that’s been run under hot water first. Trust me on this one!
And those scraps that are left on the cutting board? 100% eat those! Do not throw them away! 😋 Eat straight or swirl them into homemade toasted almond ice cream.

Dairy-Free Rainbow Cookies
This is a hugely popular recipe on Well Seasoned and while I, myself, am not dairy-free, one of my wonderful readers tested the recipe using Miyokos vegan butter and said the recipe turned out perfect. Who knew?!
(But also, this is why it’s incredibly helpful to leave reviews! Thanks in advance, friends! 😘)
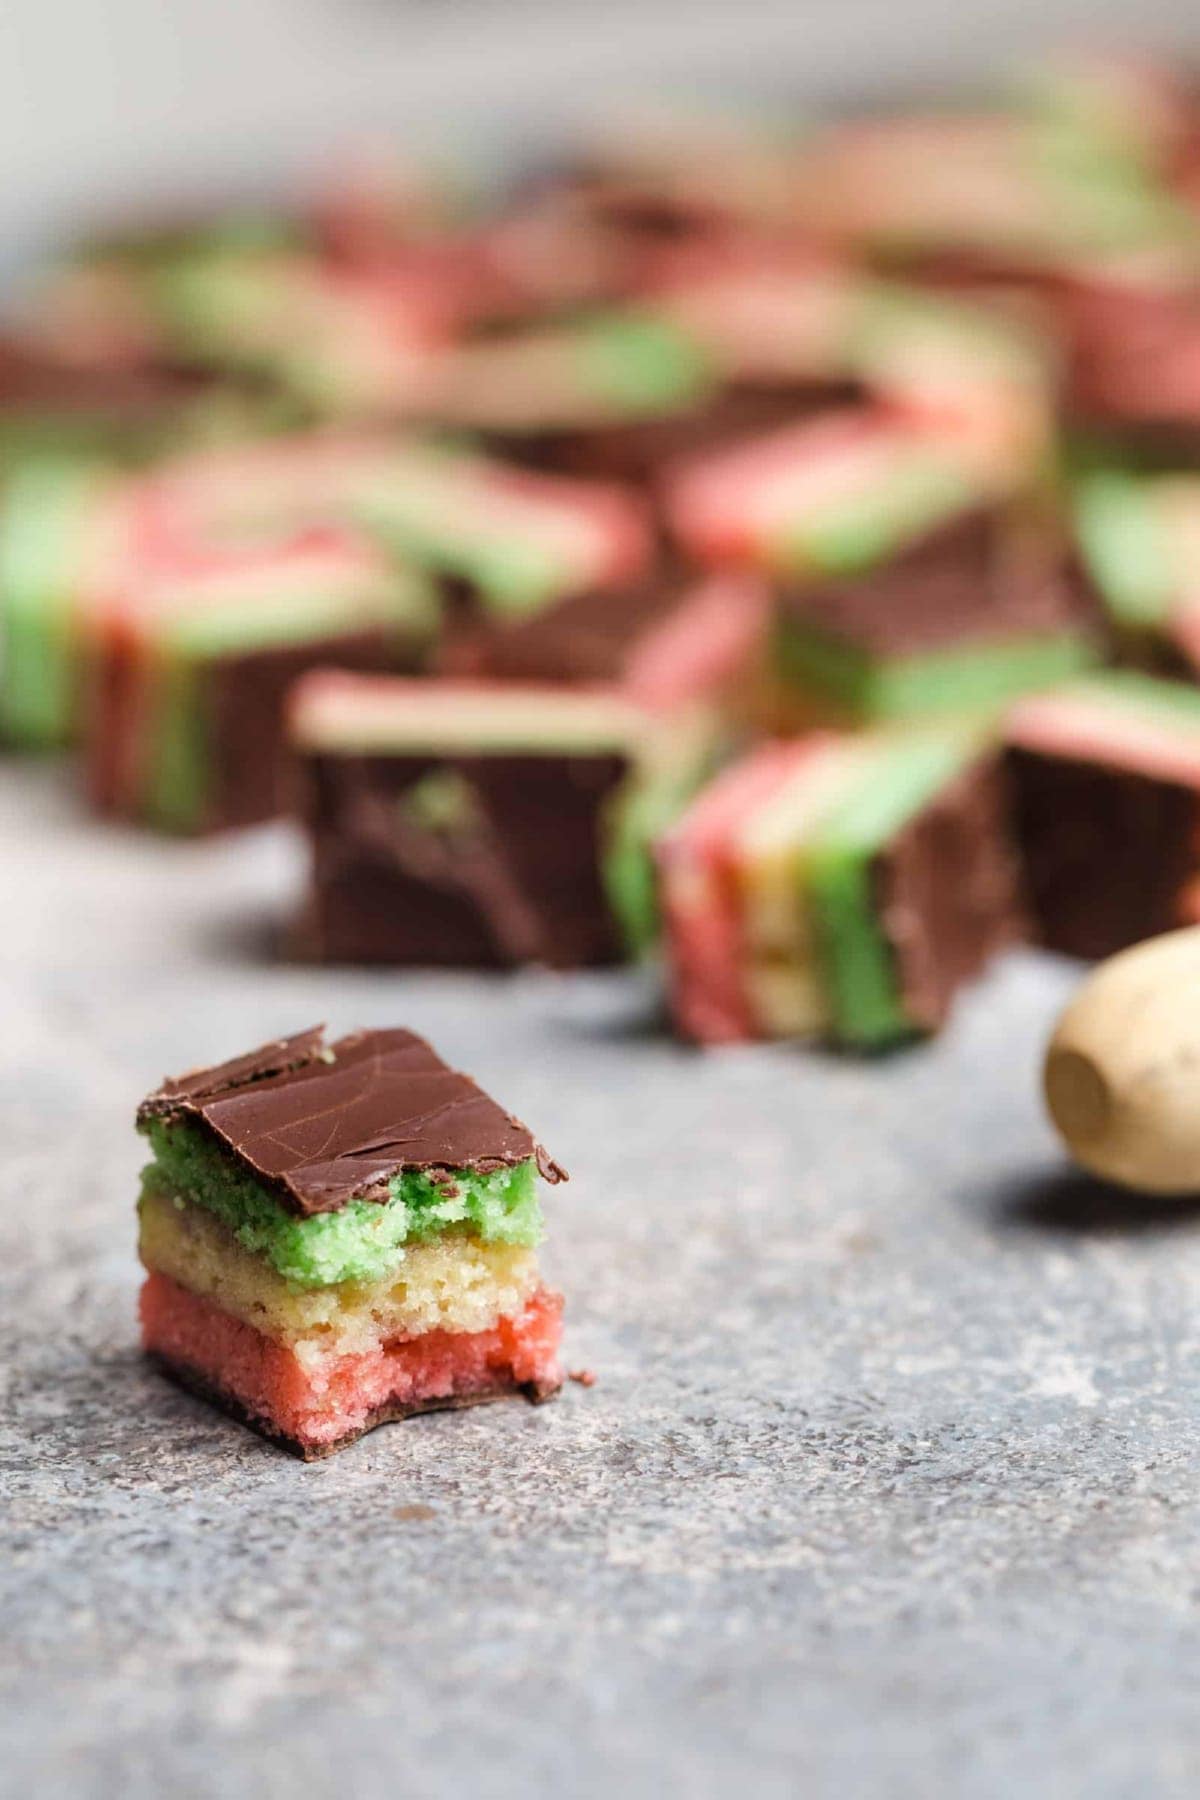
One bite and I’m certain you’ll agree, this is the most reliable (and foolproof!) homemade Italian rainbow cookie recipe ever, period the end. Absolutely cannot wait to hear what you think, so be sure to leave a ⭐️⭐️⭐️⭐️⭐️ review and rating below.
And make sure to sign up for our newsletter and follow along on Instagram, TikTok, YouTube, Pinterest, and Facebook for more Well Seasoned recipes! Don’t forget to tag us on social channels when you make a recipe at #wellseasonedstudio and upload your photos below! We love seeing what you’re up to in the kitchen!
Complete your holiday cookie boxes with more reader favorite recipes:
- Flaky, buttery chocolate raspberry rugelach
- Tender chocolate biscotti dipped in pistachios
- Miso browned butter chocolate chip cookies with crisp edges and gooey centers
- Chocolate chip mandel bread cookies—these are a bit more crumbly than biscotti!
- Buttery rosemary shortbread cookies
Tell Us What You Think!
If you make this recipe, don’t forget to leave a review and rating—we value your feedback and it helps us keep creating (and sharing!) free recipes. Your support means the world!
Rate this Recipe
Foolproof Italian Rainbow Cookies Recipe
Video
Equipment
Ingredients
- 4 large eggs, separated
- 1 cup (200g) granulated sugar, divided
- 8 ounces (227g) almond paste, or a 7-oz tube
- 1¼ cups (2½ sticks; 280g) unsalted butter, softened
- 1 tsp almond extract
- 2 cups (240g) all-purpose flour
- ½ tsp Kosher salt
- red food coloring
- green food coloring
- 10 ounces raspberry preserves warmed
- 7 ounces (200g) semisweet chocolate chunks, chips, or melting wafers
Instructions
- Prepare the sheet pans. Position a rack in the middle of the oven and preheat to 350°F (175°C). Grease, flour, and line the bottoms of three 9×13-inch (quarter sheet pan) with parchment paper, leaving a 2-inch overhang.
- Beat egg whites. In the bowl of a standard electric mixer fitted with the whisk attachment, beat 4 large egg whites at medium-high speed until they just hold stiff peaks. With the mixer running on high speed, add ¼ cup (50g) sugar a little at a time, beating until whites hold stiff, glossy peaks, about 2-3 minutes. Transfer to another bowl, and wipe the bowl dry with a paper towel.
- Mix sugar and almond paste. Switch the mixer to the paddle attachment and beat together 8oz (227g) almond paste and remaining ¾ cup (150g) sugar until well-mixed, about 3 minutes. Start with the mixer on slow, then increase speed to medium, otherwise the mixture will fly out of the bowl.
- Incorporate butter. Add 2½ sticks (280g) softened butter and beat until pale and fluffy, about 3 minutes. Add 4 large egg yolks and 1 tsp almond extract and beat until well combined, about 2 minutes. Reduce speed to low, then add 2 cups (240g) flour and ½ tsp Kosher salt, mixing until just combined.
- Fold in egg whites. Fold half of the egg white mixture into the almond mixture to lighten, then fold in remaining whites gently but thoroughly.
- Divide batter among 3 bowls. I recommend weighing the batter on a food scale, then dividing equally in thirds into three separate bowls.
- Color the cookies. Stir 6-8 drops of red food coloring into one bowl and 6-8 drops of green food coloring into another, leaving the third bowl plain. Different food colorings have different intensities. Keep in mind the batter will bake up darker than it looks raw. Pour the batter from one of the bowls into one of the prepared pans. Using a small offset spatula, spread the batter into an even layer. It will be extremely thin, but there is enough!
- Bake the individual layers. Bake the layer for 8 to 10 minutes, until just set (the cake may look undercooked, but this is what you want). Repeat with the remaining bowls of cake batter and sheet pans, transferring each baked cake to a wire rack to cool completely.
- Assemble the layers with preserves. When all the layers are cool, invert the green layer onto a parchment- or wax paper-lined baking sheet. Peel off the paper from the layer and brush on half of the heated preserves. Flip the white layer on top of the green layer and peel off the paper. Spread with remaining preserves. Invert the red layer on top of white layer and discard the paper.
- Chill overnight. Cover tightly with plastic wrap and place another quarter sheet pan on top, right side up. Evenly distribute a heavy weight on top of the sheet pan — I place heavy cookbooks on top! — and place in the fridge to chill for at least 8 hours or overnight.
- Bring the cake to room temperature. Remove the weights and plastic wrap and let the layer sit on your counter for a few minutes to come to room temperature. Melt the chocolate wafers in a microwave-safe bowl in 30-second increments, until smooth.
- Pour on melted chocolate. Trim the edges of the assembled layers with a long serrated knife to even them out. Use a small offset spatula to quickly (like REALLY quickly) spread half of the melted chocolate in a thin layer on top of the cake. Place the cake back in the fridge to firm up the chocolate, about 10-15 minutes. Place a sheet of wax paper on top of the chocolate layer, place another quarter sheet pan on top, then invert the cake and remove the paper. Quickly spread with the remaining chocolate. Freeze the chocolate-covered cake until just slightly firm, about 10 minutes.
- Slice cookies. Cut lengthwise into 6 strips, then cut each strip crosswise into 16 pieces. The cookies are much easier to cut when cold, but if they're completely frozen solid (like you forget them in the freezer and came back to them the next day), allow to thaw slightly or the chocolate will crack as you slice into it.
- The cookies can be stored in an airtight container in the fridge or freezer.
Notes
- To freeze: store baked, sliced Italian rainbow cookies between layers of parchment paper in freezer-safe containers. Cookies will keep up to 3 months.
- To defrost: allow cookies to sit at room temperature for 15 minutes before serving. The cake layers defrost pretty quickly!
Nutrition
*Recipe adapted slightly from Nina Caldas via Food52.



Oh my gosh, these are so fun to make and so so delicious. they’d make such a great gift. I made them for me though, so now I have a big stash of these cookies and might just have one with every cuppa from here on 🙂 Thanks for wonderful recipe, Ari
(Review provided by an employee of wellseasonedstudio.com.)
Marie, thank you!!! These are my absolute favorite cookies to make and gift during holiday! We usually make a few batches and gift to the kids’ teachers and our close friends. I’m so glad you enjoyed them as well! xo, Ari
Made these for my VERY Italian family (like my dad is off the boat Sicilian) and they LOVED them. I’m absolutely obsessed with this recipe and will probably never buy from a bakery ever again. Simple instructions and the flavor is so on point!!! I can’t rave about this recipe enough.
Alyssa, this is the best!!! We are crazy in love with this too, and are always so glad it makes enough to feed an army (or a large Italian family lol). Thanks for the review! xo, Ari
Absolutely delicious cookies. I loved the step-by-step photos. Such an awesome Christmas cookie plate cookie since this recipe makes so many!! Can’t wait to make it again!
So, so glad these turned out well!! Rainbow cookies are so perfect for holiday gifting and AGREE, the best part is that it makes so many!! xo, Ari
Easy to follow recipe and these came out delicious.I have never had these before and wanted to try something new.
Love hearing this, Jody! Thanks for making the cookies and leaving a review! xo, Ari
I can’t rave enough about how delicious this cookie recipe is. They make a good sized batch but they won’t last long. I bought quite a few of my ingredients from Europe and since I got enough almond paste left over i am making another batch tonight. So glad this was the first recipe I tried now its my go to forever.
Thanks, Mary! It’s absolutely one of our family’s favorites as well. It takes time, but they’re definitely not hard to make. That flavor and texture can’t be beat! xo, Ari
This recipe allowed my cousins to relive some of the best memories of their late father and Grandmother in NY. I cut the cookies into an 8×8″ cake plus cut lots of cookies that I shared with friends and neighbors. Everyone absolutely loved it! I substituted Bob’s Red Mill 1-to-1 flour to make the cake gluten-free as one of my cousins has Celiac disease. The texture was still perfect. I also doubled the recipe as I made my own almond paste (incredibly fast and easy) and it made 12 oz. of almond paste. This enabled me to pour an extra layer of cake (may not be traditional, but the purple, teal, plain, and pink layers were very pretty) and increase the height of the other cake layers by a very small amount. This recipe took time, but it was easy to follow and well worth all the effort. P.S. If you serve this as a cake, buttercream decorations make this even more decadent.
This all sounds fantastic, Catherine! Love that you were able to make these gluten-free friendly. And yes, it definitely takes a little foresight and planning ahead, but definitely easy to tackle. Thanks so much for the review!! xo, Ari
These are delicious! Everyone I gave them to loved them. I felt the pressure giving these to a big, very Italian family but they were all impressed! Definitely want to make these again.
The layers with the food coloring need to be cooked longer because of the extra liquid I’m guessing… mine came out raw in the spots and I had a piece it together😞 the white layer was fine. I would say cook the colored ones 2-3 minutes longer.
Hi Michaela, so sorry to hear this. I’ve made this recipe dozens of times and never had that experience (and have not received that feedback from others who have made it, either in person or who have left reviews here). I would advise folks to stick with the cook time as written in the instructions, but check the cake (as you would for any baking recipe) to make sure it’s done. The food coloring should not affect the cook time. More likely it’s variation in oven temperature or location of the sheet pan in the oven. Best, Ari
Hi I love the recipe but my layers are SO thin. Did this happen to anyone else? I used a 9×13 pan too.
Hi Beth! Thanks for posting and voicing your concern. Admittedly, the spreading of the cake layers is the most labor intensive part of the recipe, but yes they should be thin! There is in fact a video of the whole process. You can access the video here for ease. Hope this helps! xo, Ari
Can I leave the cakes in the fridge (with heavy cookbooks on top) for 24 hours? Or is that too long? Also, what are quarter sheet pans? Can I use a 9×13 baking dish? Or a sheet pan?
Hi Caelyn! You can absolutely refrigerate for 24 hours. That’s no problem at all. The weighing down of the cake layers is to help ensure that each layer doesn’t slide around. They might slide around if there’s too much raspberry jam or if they haven’t been pressed long enough. The only time you could possibly go “too far” with refrigeration or freezing of the cookies is after you pour the melted chocolate on top. So a word to the wise (and yes this is written in the post, as well): spread the melted chocolate very, very quickly! You’re spreading hot chocolate on a refrigerated (or frozen) cake. The chocolate will harden extremely fast. You want it spread over the entire top layer before it firms up. Once the chocolate is on both sides and you return the cookies to the freezer to set up for a few minutes, don’t leave them in too long. Otherwise, when you go to slice the cookies, the chocolate will crack. Obviously doesn’t change the taste, but it will have the appearance of, well… cracked chocolate haha.
This is the exact 9×13 quarter sheet pan I use. No baking dish needed, but note that it is not a standard ½ size sheet pan, it’s the smaller one!
The last thing I’ll say is that each time you make these, it gets easier. The most challenging part is spreading the thin layers of the cake onto the parchment-lined sheet pan for baking, because there’s juuuuust enough batter to reach the edges, and it will be very thin. But once you get that down, the rest is pretty straight forward. Enjoy, and please report back to let me know what you think! xo, Ari
These were a huge hit! Our favorite cookies were fun to make and much easier than I thought they’d be. Your directions were spot on. My family thought they were better than any we’ve gotten at a bakery, and there’s plenty left over to share.
They are the MOST fun cookies to make!! Thrilled you love them too! xo, Ari
I have been making these the last few years for my husbands birthday, as they’re his favorite dessert. He says every year that they’re the best he’s had. I’ve brought the leftovers into work on multiple occasions and everyone raves! These are definitely the best Italian rainbow cookies and a very easy recipe to follow. The only thing I do differently is put apricot preserves on one layer because we like both flavors.
This makes me SO happy to hear, Jen! I am longing for holiday season because I always make 2 or 3 batches for friends and family. Truly the best cookie! xo, Ari
A great recipe, follow exactly (i did add a bit more almond extract) and it will turn out!
Thank you so much, Samantha! xo, Ari
Very. Delicious. I was skeptical because I don’t have a large bowl mixer with a paddle but determination and a wooden spoon helped! I also don’t have quarter pans so used a 9 inch cake pan. Everything stacked great, held great and tastes AMAZING. Don’t let a lack of equipment keep you from trying this recipe. Thank you!
I love this feedback!! I’m so thrilled they came out well, these are my favorite holiday cookies! xo, Ari
Great recipe! Pretty sure I dirtied every dish I own making these but it was worth it lol. I only have two 9×13 pans so for the third sponge, I just baked it on a 10×15 cookie sheet but tried to keep the same dimensions as the other two. Since you’re trimming the edges anyway, it worked just fine! Definitely recommend making these.
Totally agree that a lot goes into making these little cuties, but thank goodness it makes so many cookies hah! More bang for your buck, ya know?! Thanks, Laura! xo, Ari
I’ve been making these cookies for years but this recipe!! So good!! The only thing I do differently is add a little heavy cream to the chocolate- it takes a little longer to set but comes out a more fudge like consistency and is much easier to spread!
Oooh, love that tip! Thanks so much for sharing and so glad you love them too!! xo, Ari
Worth the effort!!!
Thanks, Jacky!! Agree, they’re a once or twice a year treat, but so worth the effort! xo, Ari
Recipe is amazing! My advice is to follow exactly!!! I made the mistake of cracked chocolate!!! Then I had read the recommendations after!!! I also found it easier to have the ingredients ready to pour!
Thanks ari!
Melissa
Thanks for the feedback, Melissa! I, too, had cracked chocolate many years lol — takes practice, but once you get it down and understand the method, they come together a bit quicker the next time! Happy holidays! xo, Ari
I modified the recipe a little- over many trials I figured out the proportions of the almond paste and I’ve incorporated the “almond paste” as almond flour, sugar, an extra egg, and a little more almond extract directly into the recipe instead of going through the step of the making the almond paste separately. Also I don’t divide the eggs- just beat the heck out of it. I also don’t always color them and that takes out another step. Lastly, if you put parchment paper on the top of the cookies as well as the bottom, it will give the top of them a more porous texture that will help the jam stick them together better, then you don’t need to press them. These are a labor intensive cookie and this streamlined process makes it so much easier!
These are really good and so pretty. Here’s a tip – add a small amount of oil (I used coconut oil) to the chocolate. It makes it easier to cut and the chocolate is not as apt to shatter.
I’ve used this recipe several times it’s my favorite. I forgot the egg yolks once it it still came out amazing. Best recipe I’ve found! I also only coat chocolate on the top otherwise it’s too much chocolate. Family preference 😊
Thank you, Michaela!! Definitely a family favorite here too! And amazing that they still turned out great even without the egg yolks. xo, Ari
Hi! So excited to make these. I am only able to find the myokos dairy free butter with a “hint of salt”. Should I half the salt that is called for in the recipe? Or omit it all together? Thanks!
I’ve been making a variation of your recipe for many years and today tried yours. What is your preferred way to freeze them? I need to travel with them in 3 weeks & won’t have time the days prior to make them. Wrap in aluminum foil or plastic wrap & freezer bags? Thanks in advance.
Hi Fran! I include tips for freezing the rainbow cookies in the blog post (see above). This is definitely an easy option, as they only take about 10-15 minutes to defrost once they’re cut and still taste amazing. Enjoy! xo, Ari
Hi!
I’m from Canada and I wasn’t able to find any almond paste. The closest I found was Edde Almond paste/marzipan. Is it ok to use that and lower the sugar in the recipe?
Hi Em! I just looked up that brand — it looks A-okay to me! I haven’t tested this recipe with less sugar, so I’d recommend baking it as directed the first time for best results. Once you’ve tried it, feel free to make any adjustments based on personal preference. Enjoy and let me know what you think! xo, Ari
This recipe is SO good! Though all the steps may be intimidating, it’s actually quite easy and straight forward. I was freaking out every step thinking I was doing it wrong but you just have to trust the process! Also, If you don’t have access to almond paste or it’s too expensive, I made it with marzipan which honestly didn’t mess anything up (still delicious!!) I also made another batch using homemade almond paste
1 cup almond flour (129 g, packed)
½ cup powder sugar (50 g)
⅛ teaspoon kosher salt
1 egg white
1 teaspoon almond extract – Just mix all of it together until it forms a paste! )
Thank you Ari!!
It truly is the best! Love that you made your own almond paste. You’re amazing! xo, Ari