


Burnt Basque cheesecake, also known as tarta de queso, is the best kind of cheesecake: it’s made entirely in one bowl (yes, really!), has no crust to fuss over, and doesn’t require a water bath. 🙌🏻 It’s defining characteristics include a rich, custard-like texture, an ultra-caramelized top, and a not-too-sweet, slightly tangy flavor.
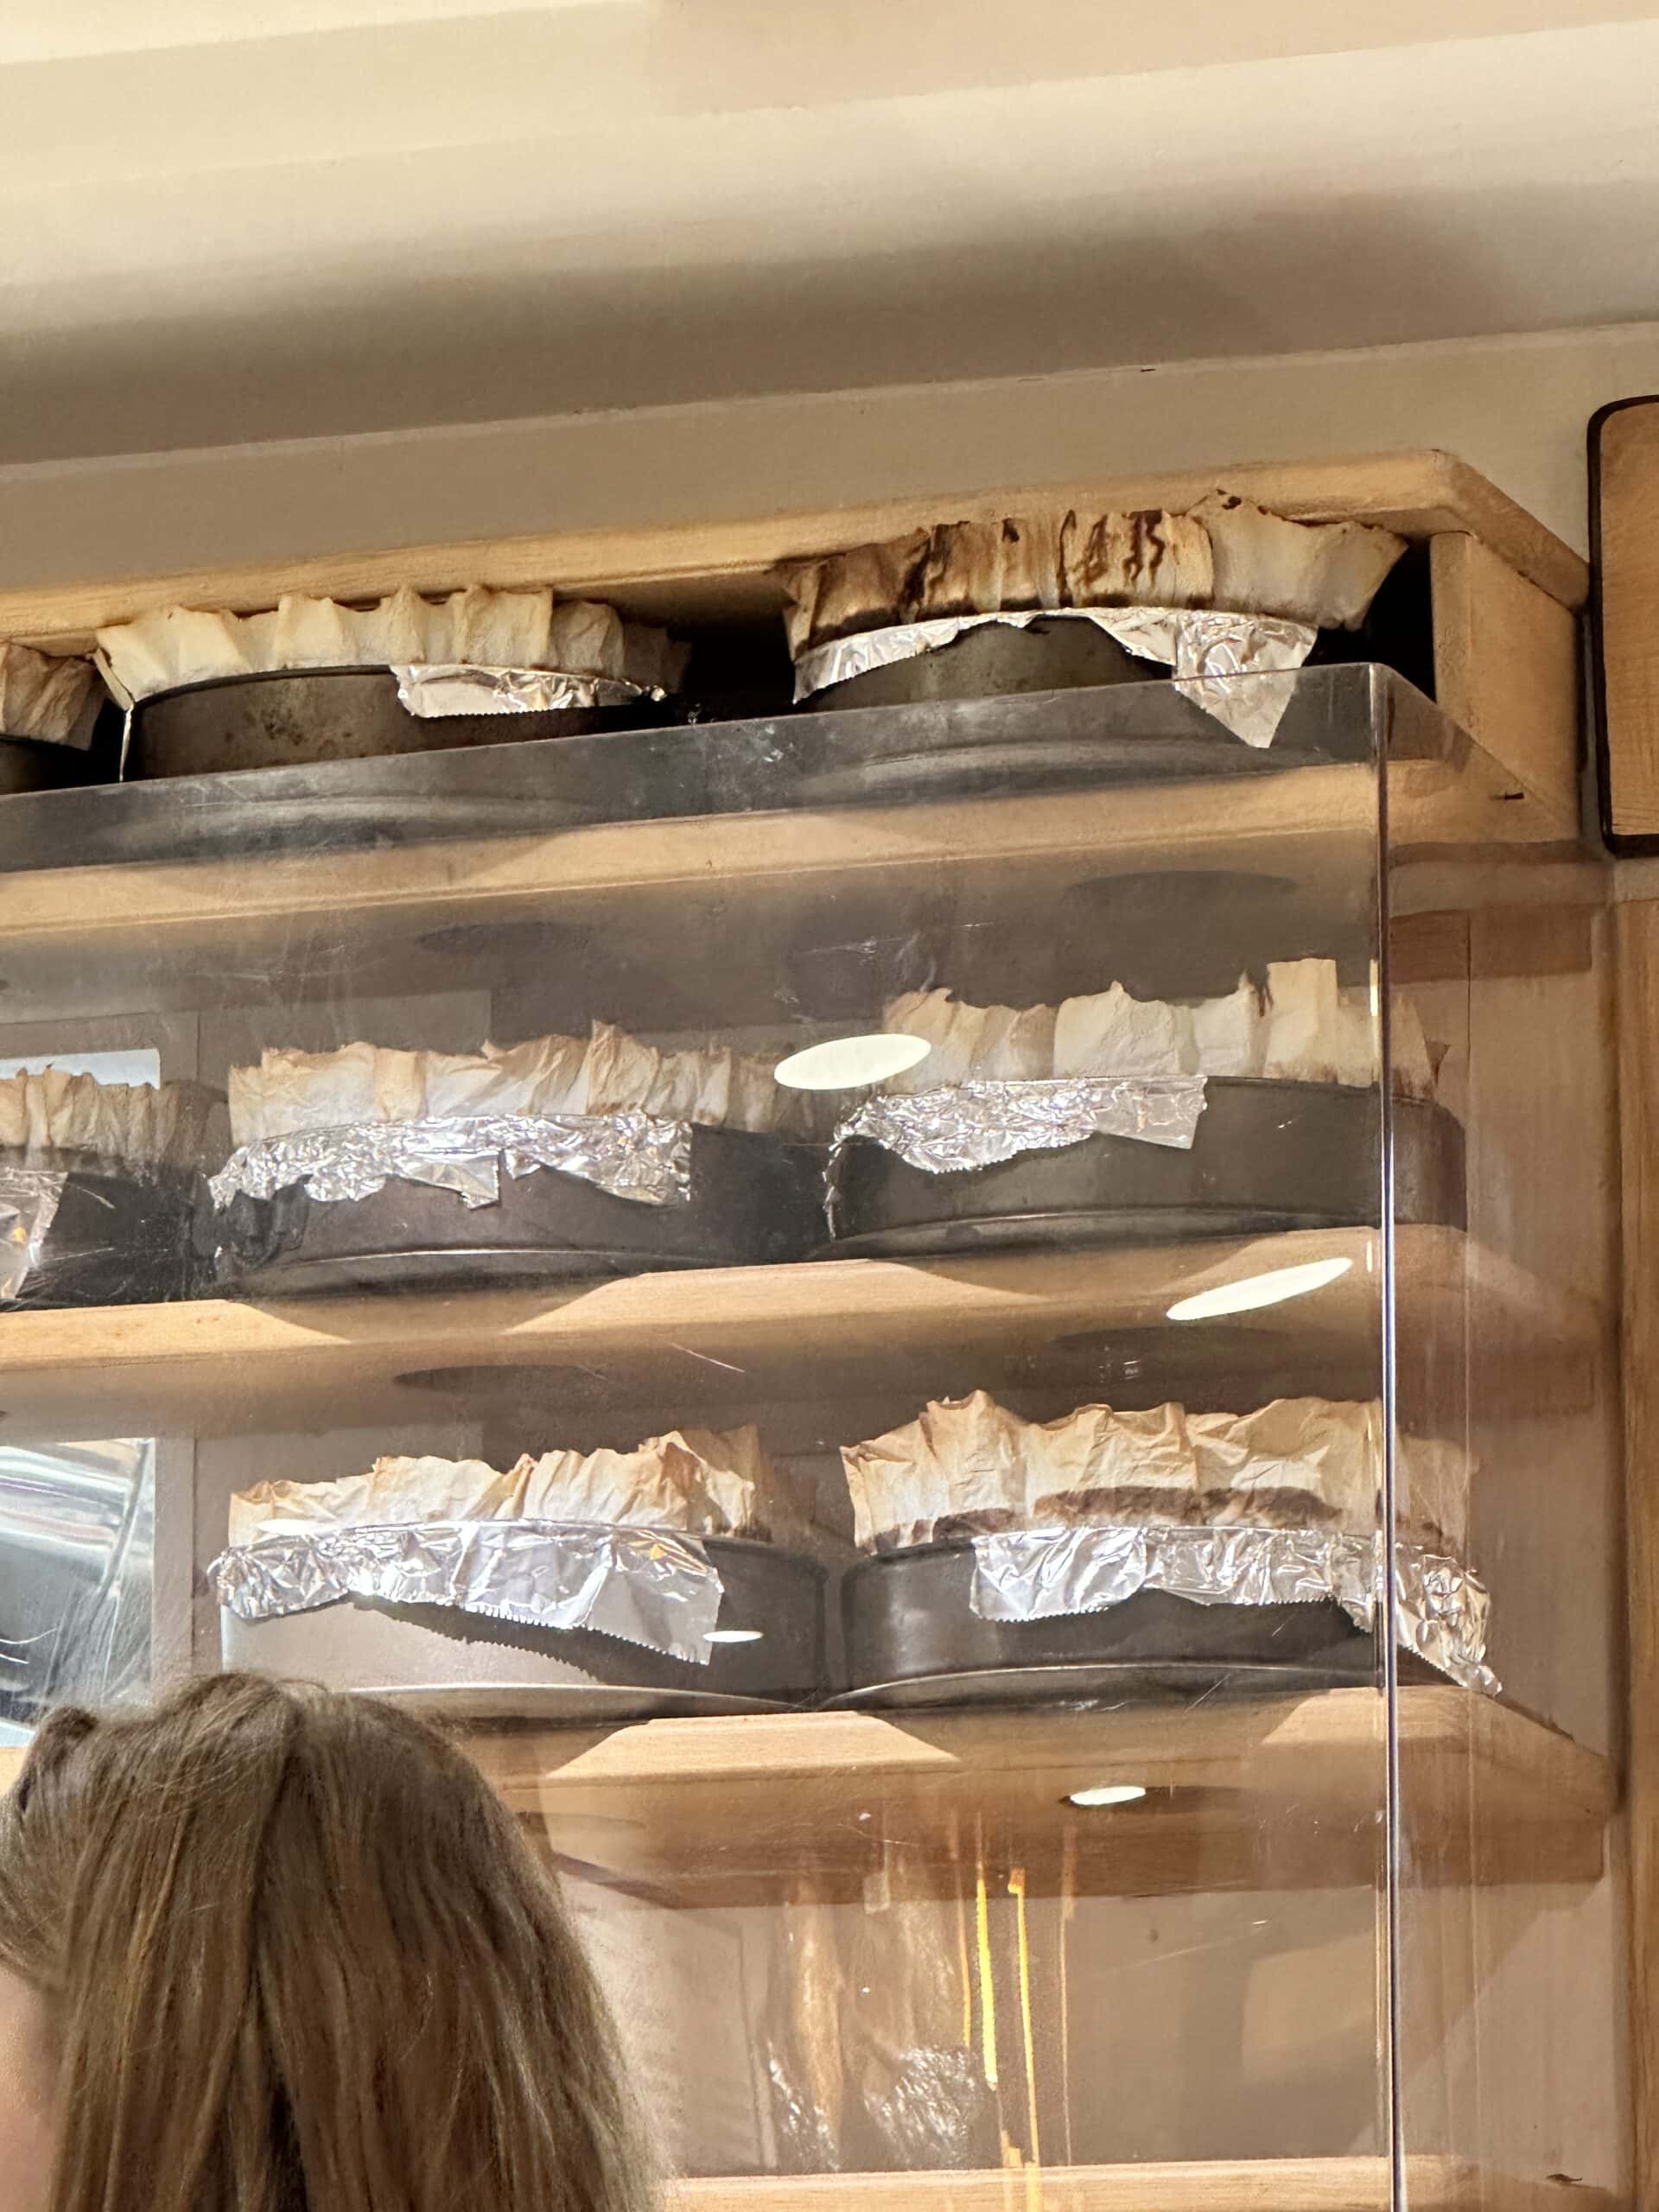
I was lucky enough to try the original Basque cheesecake from La Viña several years ago when I traveled to San Sebastián. When you walk inside, you immediately see dozens of cheesecakes lining the walls, sitting at room temperature and waiting to be sliced. Seriously, they have shelves lining the walls specifically to hold cheesecake.
Was it delicious? 100%! Is it easy to make yourself at home? A resounding yes!
Here’s Everything You’ll Need

The key here is to use room temperature cream cheese. Set it out on the counter in the morning, let it hang out, then when you’re ready (hopefully an hour or more later), everything will blend together easily.
I like to bake this in a large springform pan (mine is 10 inches round), but I have successfully divided the batter between two smaller 8-inch round cakes pans with great success. Just be sure to lime them with a bit of parchment paper.
How To Make Burnt Basque Cheesecake


From experience I can tell you… the mixer must start on the lowest speed after you add the liquid! This makes a lot of cheesecake batter, and you are very likely to have heavy cream splash all over if you start the mixer too quickly.

Yes, when I’m being impatient I will sometimes just add the flour without sifting if. If you go that route, simply switch to a whisk to make sure there are no lumps in the batter.
I like to pop the springform pan onto a larger sheet pan in case there’s any bubbling over. This doesn’t typically happen, but better safe than sorry when it comes to scrubbing an oven clean…

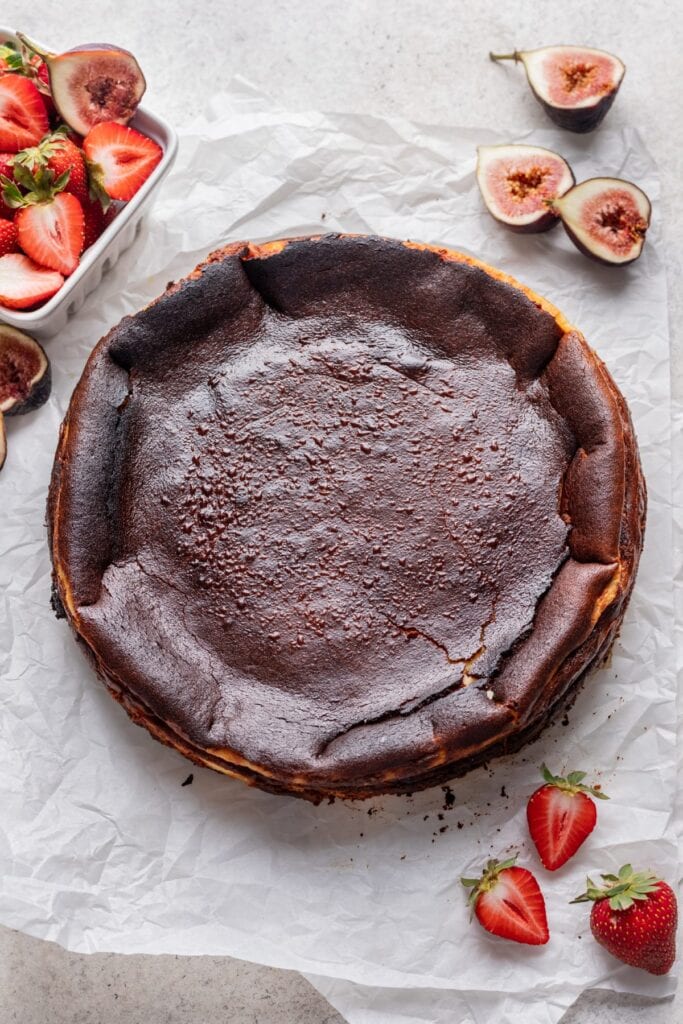
You’ll know the cheesecake is ready when it’s a deep golden brown on top, but still has a slight wobble in the center. Transfer to a wire rack and let it cool for at least 1-2 hours before carefully unmolding and slicing.
Serving Suggestions
While burnt Basque cheesecake is typically served plain, you can top it with whipped cream, powdered sugar, fresh fruit, or a drizzle of honey. A cup of coffee or hot tea on the side would be delightful.

A Make-Ahead Dessert Dream Come True
Probably the best thing about this dessert is that you absolutely can make it ahead of time (at least 2 hours in advance, but up to 2 days is fine!), but unlike a traditional NY-style cheesecake, it doesn’t need to cool overnight for 8 hours. You can absolutely make it mid-day and enjoy it that same evening. Love that for us.

If you’ve been on the fence about making a burnt basque cheesecake recipe — or even deterred simply because you thought “burnt cheesecake” meant overcooked and dry — add this to your must-make list immediately. You will be so pleasantly surprised. It’s a homeerun every single time!
And make sure to sign up for our newsletter and follow along on Instagram, TikTok, YouTube, Pinterest, and Facebook for more Well Seasoned recipes! Don’t forget to tag us on social channels when you make a recipe at #wellseasonedstudio and upload your photos below! We love seeing what you’re up to in the kitchen!
Tell Us What You Think!
If you make this recipe, don’t forget to leave a review and rating—we value your feedback and it helps us keep creating (and sharing!) free recipes. Your support means the world!
Rate this Recipe
Creamy, Custardy Burnt Basque Cheesecake
Equipment
Ingredients
- Nonstick baking spray or butter
- 2 lbs (900g) cream cheese full fat, room temperature
- 1½ cups (300g) granulated sugar
- 6 large eggs
- 2 cups (480g) heavy cream
- ½ lemon zested, about 1 tsp
- 1 tsp Kosher salt
- 2 tsp vanilla extract
- ¼ cup (33g) all-purpose flour
Instructions
- Prepare the pan. Place an oven rack in the center of an oven, then preheat to 400°F205°C. Grease a 10-inch springform pan with nonstick baking spray (or butter), then lay two large sheets of parchment paper inside, ensuring at least 2-3-inches of overhang on all sides of the pan. Press down to smooth out as much as possible inside the pan.
- Beat the cream cheese and sugar. Place 2 lbs cream cheese (900g) and 1½ cups sugar (300g) in the bowl of a stand mixer fitted with paddle attachment. Beat on medium speed until very smooth and creamy, about 3-4 minutes. Scrape down the sides, then beat again until well mixed.
- Add the wet ingredients. With the mixer running on medium-low speed, add 6 large eggs, one at a time, allowing 15 seconds between each addition. Scrape down the sides of the bowl at the end, then mix again until homogenous and smooth. Add 2 cups (480g) heavy cream, the zest of half a lemon, 1 tsp Kosher salt, and 2 tsp vanilla extract, then mix on medium-low until thoroughly incorporated, about 30 seconds more.
- Add the flour. Sift ¼ cup (33g) of flour directly into the bowl, then mix for about 30 seconds more. Scrape down the sides and the bottom of the bowl to ensure there are no lumps, then mix again for another 15-30 seconds.
- Bake the cheesecake. Pour the cheesecake batter into the prepared baking pan, then place on a rimmed baking sheet. Bake for 60-70 minutes, rotating the pan once halfway through cook time, until the top is a deep golden brown. The center should still be a little wobbly. Remove and set aside to cool for about 1-2 hours on a wire rack. When ready, unmold the springform pan, then carefully transfer the cheesecake to a cutting board. Cut into slices, then enjoy at room temperature.
Notes
- Tips: Broil briefly (about 6 inches from heat) for a darker top—watch closely. For clean slices, use a hot, dry knife.
- Make ahead & storage: Make up to 2 days ahead; refrigerate tightly wrapped and bring to room temp 1–2 hours before serving. Refrigerate leftovers for 3–4 days.
- No stand mixer? Use a food processor: blend all ingredients until smooth, scraping once, then bake.
- Pan swap: No 10-inch springform? Use two 8-inch round pans lined with parchment; bake at 400°F/205°C for 30–40 minutes, rotating halfway.
- To make gluten-free, simply substitute with your favorite one-for-one gluten-free flour.
Nutrition
Photography by: Alana of Your Home Made Healthy.
Recipe very slightly adapted from Bon Appetit.


Let us know your thoughts!